Tuesday, January 31, 2012

Moist Walnut Cupcakes-SC #8

Today is the day for moistly delicious walnut cupcakes.  It's a balmy 50 degrees outside, making the urge to jump in a pool and smell the acidic scent of sunscreen unbearably strong.  So of course, I fired up my oven and got busy baking.  My mom has decided that if I'm going to bake all the way through this cookbook, we are going to have to start cutting the bigger recipes in half to save on ingredients, and to save ourselves from gaining much more weight.  Most of these recipes will work if you would like to half them, but not all.


I did cut this recipe in half and it turned out splendidly! The batter was the most flavorful batter I've ever had and I will definitely be using walnut powder in my baking for the future.  A few tips about this recipe;

  • Be careful not to grind the walnuts too much because the nuts could turn into oil if you blend them too much.
  • Use a food processor for the whole thing.  It'll save you some dishes and it blends the batter really nicely.

Moist Walnut Cupcakes
makes 12

generous 3/4 cup walnuts
4 Tbsp butter, softened, cut into small pieces
1/2 cup superfine sugar
grated rind of 1/2 lemon
1/2 cup self-rising flour
2 eggs
12 walnut halves to decorate

Preheat oven to 375 degrees.  Line a muffin tin with 12 liners.  

Place the walnuts in a food processor and pulse until finely ground.  

Add the butter, sugar, lemon rind, flour and eggs and blend until the mixture is evenly combined.  Spoon the batter into liners.

Bake for 20 minutes or until well risen and springy to the touch.  Transfer to a wire rack to cool.


4 Tbsp butter softened
3/4 cup confectioners' sugar
grated rind of 1/2 lemon
1 tsp lemon juice

To make the frosting, place the butter in a bowl and beat until light and fluffy.  Sift in the confectioners' sugar, add the lemon rind and juice and mix well together.  When the cupcakes are cold, spread the frosting on top of each cupcake and top with a walnut half to decorate.

Enjoy!

Recipe courtesy of Parragon Books Ltd.

Nutella Gooey Butter Cake

Happy World Nutella Day!


Actually, the official day is this Sunday, February 5, 2012, but it's the Superbowl so I'm celebrating it early.  This cake is wonderful, it's amazingly simple to make and is so gooey and chocolatey, you'll be making it year-round.  My culinary teacher found this recipe from a blog called Plain Chicken, which after some research, I found has multiple recipes using Nutella, so maybe I'll dip into those concoctions as well.  I made this in my Culinary Arts class and the whole class was begging for a piece before it even came out of the oven.  You'll feast with your nose before you devour your piece.  Sorry that I don't have any pictures of the actual cake, but it got eaten so fast I didn't even have time to snap a single picture!

Nutella Gooey Butter Cake
make one 9 by 13 pan

Cake
1 (18 1/4 oz) package devil's food cake mix
1 egg
8 Tbsp butter, melted

Filling
1 (8 oz) package cream cheese, softened
1 cup Nutella
3 eggs
1 tsp vanilla
8 Tbsp butter, melted
1 (16 oz) box powdered sugar

Preheat oven to 350 degrees.  Combine the cake mix, egg, and butter and mix well with an electric mixer.  Pat the mixture into the bottom of a lightly greased 13 by 9 pan.

To make the filling, beat the cream cheese and Nutella in a large bowl and mix until smooth.  Add the eggs, vanilla, and butter and beat together.  Next, add the powdered sugar and mix well.  Spread the Nutella mixture over cake batter and bake for 40 to 50 minutes.  Make sure not to over bake as the center should be a little gooey.

Recipe courtesy of www.plainchicken.blogspot.com

Sunday, January 29, 2012

Double Dose of Cupcakes-SC#6 & #7

Tonight there is an all new Cupcake Wars on!!! And it's about the show I Love Lucy!!  I DO love Lucy!! And that show.  Can you tell?


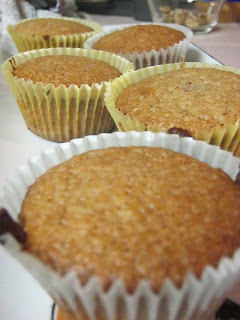
So naturally, since I consider myself a baker and all, I made some cupcakes.  Who doesn't always crave whatever food they see while watching a show on the Food Network?  My point exactly.  So I first made Chocolate Orange Cupcakes, and then proceeded to make Warm Strawberry Cupcakes.  They were making cinnamon cupcakes on the show for one of the rounds, but there wasn't a recipe for that in Scrumptious Cupcakes so I was out of luck.  But on the bright side, I knocked out two recipes today!!  But my kitchen was full of dirty dishes!


A few notes for the Chocolate & Orange Cupcakes;


  • Make sure the chocolate you use for the topping is sweetened!! Mine was not so that's why my frosting isn't as shiny as it's supposed to be.
Notes for the Warm Strawberry Cupcakes Baked in a Teacup;

  • Use homemade preserves, it make a huge difference in the taste.
  • You can also use ramekins instead of teacups, but use a tad more preserves in the bottom. 
Chocolate & Orange Cupcakes
makes 16


1/2 cup butter, softened
generous1/2 cup superfine sugar
finely grated rind and juice of 1/2 orange
2 eggs, lightly beaten
generous 3/4 cup self-rising flour
1 oz dark chocolate, grated
thin strips of candied orange peel, to decorate (I used freshly grated orange peel because I didn't have                 time to candy it)

Preheat the oven to 350 degrees.  Line two muffin tins with 16 paper liners.

Put the butter, sugar, and orange rind in a bowl and beat together until light and fluffy.  Gradually beat in the eggs.  Sift in the flour and fold gently into the mixture with the orange juice and the grated chocolate.  Spoon into the paper liners.

Bake for 20 minutes, or until well risen and springy to the touch.  Transfer to a wire rack and let cool.


4 oz dark chocolate, broken into pieces
2 Tbsp of unsalted butter
1 Tbsp dark corn syrup

To make the frosting, break the chocolate into a heatproof bowl and add the butter and syrup.  Set the bowl over a saucepan of simmering water until melted.  Remove from the heat and stir until smooth.  Spread over cupcakes and decorate each with a few strips of orange peel.  Let set.


Enjoy! (Like I did hehe)


Warm Strawberry Cupcakes Baked in a Teacup
makes 6


1/2 cup butter, softened, plus extra for greasing
1/4 cup strawberry preserve
generous 1/2 cup superfine sugar
2 eggs, lightly beaten
1 tsp vanilla extract
generous 3/4 cup self-rising flour
6 whole strawberries for decorating
confectioners' sugar for dusting

Preheat the oven to 350 degrees.  GRease six ovenproof dishes with butter.  Spoon 2 teaspoons of the strawberry preserve into the bottom of each teacup.

Place the butter and sugar in a large bowl and beat together until light and fluffy.  Gradually add the eggs, beating well after each addition, then add vanilla extract.  Sift the flour and fold into the batter.  Spoon the batter into the teacups.


Stand the cups in a roasting pan, then pour enough hot water to come up 1/3 the sides of the cups.  Bake for 40 minutes, or until well risen and springy to the touch.  If over browning, cover the cupcakes with tin foil.  Let cool for 2-3 minutes, then carefully lift from pan and place on saucers.

Top each cupcake with a strawberry, then dust with sugar and serve warm.

Enjoy!


Recipe courtesy of Parragon Books Ltd.

Friday, January 27, 2012

Mocha Cupcakes with Whipped Cream-SC #5

This recipe is quite different from the other recipes in this collection.  It uses several techniques I was not familiar with, but I'm so glad I am now.


I highly recommend you try your hand at these too because they are so worth it.  If you do accept the challenge of creating these masterpieces, please know that this took me almost 2 hours.  I know, that's a long time just to make 20 cupcakes, but the whole process with take some time.  Remember this when planning for this recipe.  Also, put topping on COMPLETELY cool cupcakes, otherwise you will ruin all that whipping you just did.  And only apply the topping when you are just about to serve it.  Here's a few notes on the recipe:
  • The mixture that you bring to a boil will take longer than you expect, but be patient.  
  • Cool this at room temperature.  I know it take longer than popping it in the fridge for a little bit, but the fridge with cause it to create a skin and that is not good.
  • Watch them carefully, mine were done in exactly 15 minutes.
  • Be patient when you are whipping the cream, it takes time.  And please use a mixer; you might break your arm.
  • To add a slight sweetness to the whipped cream, add about one teaspoon of sugar.


Mocha Cupcakes with Whipped Cream
makes 20

2 Tbsp instant espresso coffee powder (or one pkg of Starbucks Via)
6 Tbsp butter
1/2 cup superfine sugar
1 Tbsp honey (or really high quality maple syrup)
generous 3/4 cup water
1 2/3 cup all-purpose flour
2 Tbsp unsweetened cocoa
1 tsp baking soda
3 Tbsp milk
1 large egg, lightly beaten.

Preheat oven to 350 degrees.  Line muffin tins with 20 paper liners.

Place the coffee powder, butter, sugar, honey, and water in a saucepan and heat gently, stirring until the sugar has dissolved.  Bring to a boil, then reduce the heat and let simmer for 5 minutes.  Pour into a large heatproof bowl and let cool.

When the mixture has cooled, sift in the flour and cocoa.  Placce the baking soda and milk in a bowl and stir to dissolve, then add to the mixture with the egg and beat together until smooth.  Spoon the batter into the paper liners.

Bake for 15-20 minutes, or until well risen and springy to the touch.  Transfer to a wire rack to cool completely.

1 cup whipping cream
unsweetened cocoa for dusting

For the topping, place the cream in a bowl and whip until it holds its shape.  Spoon heaping teaspoonfuls of cream on top of each cupcakes, then dust lightly with sifted cocoa.  Enjoy!


Recipe courtesy of Parragon Books Ltd.

Thursday, January 26, 2012

Tropical Pineapple Cupcake-SC #4


       It's Thursday night again and you know what that means!!  Cupcakes!  Grey's Anatomy!  And Michelle made no bake cookies that are simply divine.  Check them out at her blog.

       These cupcakes are perfect when you need a little taste of the tropics in the dead of winter.  The cake is moist and springy with just the right amount of pineapple flavor.  I added some toasted coconut on top to provide some flavor and texture contrasts.


Some notes on this recipe:
  • When you toast the coconut, only do a small amount unless you really like it.  Also, watch it closely because they tend to burn easily.
  • If you only had crushed pineapple on hand, use 6 Tablespoon of drained pineapple.

Tropical Pineapple Cupcakes
makes 12

2 slices canned pineapple in natural juice
6 Tbsp butter, softened, or soft margarine
1/2 cup superfine sugar
1 large egg, lightly beaten
2/3 cup self-rising flour

Preheat oven to 350 degrees.  Line a muffin tin with 12 liners.

Drain pineapple, reserving the juice.   Finely chop the pineapple slices.  Place the butter and sugar in a large bowl and beat together until light and fluffy, then gradually beat in the egg.  Add the flour and fold into the mixture.  Fold the chopped pineapple and one tablespoon of the reserved juice.  Spoon the batter into paper liners.

Bake for 20 minutes or until well risen and springy to the touch.  Transfer to a wire rack to cool completely.


Frosting


2 Tbsp butter, softened
1/2 cup cream cheese
grated rind of 1 lemon or lime
generous 3/4 cup confectioners' sugar
1 tsp lemon juice or lime juice

To make frosting, place the butter and cream cheese in a large bowl and beat together until smooth, then add the lemon or lime rind.

Sift the confectioners' sugar into the mixture and beat together until well mixed.  Gradually beat in the lemon or lime juice, adding enough to form a spreading consistency.

When the cupcakes are cold, spread the frosting on top of each cupcake.  Top with toasted coconut if desired.


Recipe courtesy of Parragon Books Ltd.

Tuesday, January 24, 2012

Chinese Cuisine

It's that time of year again; time for midterms.  Yuck!  But one exam I know I already passed.  This year I am taking an Independent Study in Culinary Arts with my friend Sam.  For our exam, we had to make a dish that is a different style than what we are used to.  Me being a baker, I decided to go the more savory route and opted for a Chinese recipe because I have never made any before.


This is how it turned out.


Sam made some onion pancakes and an egg noodle dish.  As you can see, his dish was plated much more authentically than mine.  But he had a book so that explains it.


Hopefully I aced it!

Sunday, January 22, 2012

Suprise!!!! Chocolate Pudding Cake

I love surprise parties!!!!  And so I'm taking a momentary break from baking through the Scrumptious Cupcakes book.


Last night my friends and family threw a surprise party for my guy who just turned 18 on January 18th!! It's a golden birthday!!! So we decorated in all blue and yellow ( his favorite team is Michigan) and we had a great time.


I, of course, made the cake (and we bought a cake from Dairy Queen but shhh.... I haven't figured out how to make ice cream cake yet ).


It was quite the cake to make.  Granted, I started the process Friday night at nine thirty, but I had to work earlier that day so it was the only chance I had.


There he is, blowing out his 18 candles.

I found this recipe in the 2008 edition of The Best of America's Test Kitchen.  I highly recommend exploring one of these fine cookbooks because they house incredible recipes, both sweet and savory.

If you happen to have a copy of this book nearby, please flip to page 260 to see the glorious cake this post is all about.  Looks pretty right?  Then flip to page 291 for the recipe.  Yes, you did read that right, it calls for homemade pudding.  Jell-o is doing something right because mine is chocolate milk. So instead I whipped up one of the instant packages and it made just enough pudding to cover and fill in between the layers.  But it turned out just fine :)

Saturday, January 14, 2012

Chocolate Molten Cupcakes-SC #3


This recipe is from the section in the bake book commonly known as the Chocolate Box, my favorite place in the world.


I made this as I was watching Miss America because, let's face it, those girls do not enjoy baked goods.  Clearly I do, and so, as I watched them parade around in bikinis and high heels, I treated myself to these chocolate cupcakes with a warm molten center; it was much more gratifying.


Don't they just look delightful?


Trust me, they were.


A couple notes about the recipe:


  • Put more batter in the bottom before placing the chocolate to keep it from sinking and burning the bottom.
  • Dove works very well with the flavor of the cake.
  • They will be done in exactly 20 minutes ( at least with my oven) so watch them carefully


Warm Molten-Centered Chocolate Cupcakes
makes 6

4 Tbsp butter, softened, or soft margarine
1/4 cup superfine sugar
1 large egg
2/3 cup self-rising flour
1 Tbsp unsweetened cocoa
2 oz semisweet chocolate ( I used a Dove chocolate instead )
confectioners' sugar, for dusting

Preheat the oven to 375 degrees.  Line a muffin pan with 6 liners.

Place butter, sugar, egg, flour, and cocoa in a large bowl and beat until just smooth.  DO NOT OVER BEAT.  Spoon half of the batter into the paper liners.  Using a spoon, make an indentation in the center of each cake.  Place a piece of chocolate in the center, and then spoon the remaining batter on top.

Bake for 20 minutes or until we risen.  Let the cupcakes stand in the pan for 2-3 minutes before serving warm, dusted with sifted confectioners' sugar.


Recipe courtsey of Parragon Books Ltd.

Friday, January 13, 2012

Oatmeal Cupcakes-SC #2

I know what you're probably thinking.

Eww, oatmeal in a cupcake?


Believe me, that's what I thought too, until I actually made them and tasted them.


This cupcake could be considered a muffin in some cultures, however the cake-like texture proves it to be a cupcake in my book.  Also, the oat topping is surprisingly sweet as well as a healthy alternative to icing.  I really enjoyed this recipe and so did my parents who ate them up!


This recipe is also from the Scrumptious Cupcakes book I mentioned in this post, and I have taken it upon myself to bake my way through this book.  It shouldn't take too long, as it is only 95 pages.

Two notes about this recipe:


  • The recipe states that it yields 8, however my cupcake tins might have been filled too high because I only got 6 cupcakes out of it.
  • Make sure you set out the butter early enough to soften because otherwise it becomes very difficult to beat and cream the sugar into it, and then when you add the egg, its becomes a mess and separates.  
Chewy Oatmeal Cupcakes
makes 8

3 Tbsp soft margarine
3Tbsp raw brown sugar
1 Tbsp dark corn syrup
2/3 cup rolled oats
4 Tbsp butter, softened
1/4 cup superfine sugar
1 large egg, lightly beaten
generous 1/3 cup self-rising flour

Preheat the oven to 375 degrees.  Line a 12-hole muffin pan with 8 (or 6) paper liners.

Place the margarine, raw brown sugar, and corn syrup in a small saucepan and heat gently until the margarine has melted.  Stir in the oats and set aside.

Put the butter and superfine sugar in a bowl and beat together until light and fluffy.  Gradually beat in the egg.  Sift in the flour and fold gently into the mixture.  Spoon the oatmeal mixture over the top.

Bake the cupcakes for 20 minutes or until golden brown.  Transfer to a wire rack to cool completely.

Recipe courtesy of Parragon Books Ltd.

Thursday, January 12, 2012

Banana Toffee Cupcakes and Grey's Anatomy-SC #1


Every Thursday night, my good friend Michelle and I get together and watch Grey's Anatomy together.  We are both pretty busy but its really nice to set aside this time every week to hang out and watch a show that we both are addicted to.

This past Christmas, we also exchanged presents, and she got me a bakebook!!!! I would call it a cookbook, but its all desserts and dishes that you bake so that term would not be accurate.
It's called Scrumptious Cupcakes; For the perfect indulgence.


So last night, in honor of our weekly time together, I decided to break it in and give us something sweet to munch on during the show.

It's been very snowy recently in southwestern Michigan, so I was very restricted on what recipes I could actually pull off.  I came across this recipe for Banana Toffee Cupcakes.  It looked simple enough, although it yielded just four cakes, which I suppose is perfect for Michelle and I.  I tweaked the topping a tad bit because I didn't have any heavy whipping cream or toffee sauce, but I did have Cool Whip and crushed Heath Bars.  The cakes turned out very moist because of the banana, however the picture in the book showed the cake a lot darker than mine, but both were cooked throughly.  These cakes are the perfect thing to enjoy by themselves, with the whipped cream and toffee bits, or with a bit of yogurt for a healthy morning breakfast.  Enjoy!


Banana Toffee Cupcakes
makes 4


Cupcakes
5 tbsp butter, softened, plus extra for greasing
1/2 cup light brown sugar
2 eggs, lightly beaten
3/4 cup self-rising flour
1 small ripe banana, peeled and mashed

Preheat the oven to 375 degrees.  Grease four glass, oven-proof ramekins with butter.


Place the butter and sugar in a bowl and beat together until light and fluffy.  Gradually beat in the eggs. Sift the flour in a separate bowl, and fold in to the mixture.  Add the mashed banana.  (It will look like this isn't enough batter for the ramekins, but the rises considerably) Spoon the mixture evenly into the bowls.


Put the dishes on a baking sheet and bake for 20-25 minutes, or until well risen and springy to the touch.  Transfer to a wire rack to cool.


Topping
2/3 cup heavy cream
    (or one 8 oz pkg of Cool Whip)
1/2 banana peeled and sliced (optional)
2 Tbsp dulce de leche sauce
    (or Heath Bars)
1 Tbsp grated chocolate
    (or 6 oz chocolate)

For the topping, whisk the cream in a bowl until soft peaks form. (Use stand mixer) Spoon the whipped cream on top of each cupcake, then arrange 3-4 banana slices on top.  Drizzle over the dulce de leche and sprinkle grated chocolate.  Store the cupcakes in the refrigerator until ready to serve.

I sprinkled the crushed Heath Bars on top of the cupcakes right after they came out of the oven, that way, the chocolate pieces melted and the caramel bits softened creating a sweet, slightly crunchy topping.  Then I put a dollop of Cool Whip on top and sprinkled a couple more toffee bits on top.  then, just for fun, I drizzled some melted chocolate on top.


This is the picture that was in the book,


and this is mine.


Not too shabby.

Recipe courtesy of Parragon Books Ltd.

Sunday, January 8, 2012

Happy New Year!

I have a good feeling about 2012.  It is so bright a shiny, like a penny, or a new candy thermometer i got for Christmas.  I couldn't wait to try it out! First, I used it to make this hot cocoa.


Looks good right? That's because its from the famous Max Brenner's Chocolates in New York.


Over the holidays, my family and I trekked through the snow-less highways all the way to the East coast.  We stopped in Pennsylvania for a night to visit Grandma and Grandpa, and then headed to Baltimore to celebrate Christmas with my newest baby cousin!  After the presents had been opened and our tummys full of crab cakes and delicious almond raspberry cake, we started our journey again, this time to the big apple. 


So anyway, once we finally got to the city, we didn't know where to start!! As much as I would like to go on and on about all of our adventures, I don't want to bore you, but the will be in future posts.  The second day we were there, we walked down the block from our hotel on 5th avenue to Bryant Park.


Isn't it lovely?  I loved this tree that they had set up near the temporary shops.  And they had an ice rink!  I really wanted to skate, but there was a humongous line and the wait was over 2 hours.  Not exactly worth it to stand in the cold just so you can skate in the cold.  So we opted to explore the little shops.  Lo and behold, we stumbled across one of the Max Brenner's Chocolate shops.


If you haven't heard of Max Brenner, you must live under a rock.  His chocolate is amazing!! He has an actual permanent store on Broadway, but this store was just enough for our family.  It was tiny inside, but the smell was heavenly!  I spotted this adorable Hug Mug and yummy European Hot coco and I thought to myself, why not? We are in New York!  And so I bought it.  And my parents bought us a box of chocolates to sample as well as one of the giant chocolate chip cookies showcased in the window.  They also had a very interesting way for you to taste the pure decadence of the chocolate; by placing it inside a syringe.  Weird, right? But surprisingly good!! It was warm and made it simple to add the yummy chocolate to the giant cookie we got, and it was no mess to eat!


The hot cocoa was fabulous as well!


The top picture is my brother, (he wouldn't share his syringe) and the bottom picture is of my dad who loves hot cocoa!  We had a really great time in New York and the food there was amazing!  Happy New Year everyone!