Wednesday, March 28, 2012

Creme Brulee-ish

Sometimes we don't have words for thing we want to express.  Like a color that isn't either black or purple, so we call it purple-ish.  Or when we say we will be somewhere at a certain time but we know we will be late so we say 10:30-ish.  Today I used cream-ish to make Creme Brulee-ish.


I know that the pastry experts out there will shake their heads at me for even trying to come up with a lo-fat version of this delectable dessert but I simply didn't have the correct ingredients.  Or word.  So I'm stealing the name creme brulee and tacking it on to this yummy dessert type thing.  It's only an experiment anyways.  Have you ever come across a recipe for lot-fat creme brulee?  Didn't think so.  Maybe  I should rename this post to that...

Nahh, this is more fun.
Funner?
Fun-ish?

 More fun.


So I began like any good baker does, and scalded the cream.  Only I didn't have cream.  So I used about 1 1/4 cups of half and half and 1/4 cup of vitamin d milk.  Definitely not the same as some good quailty heavy cream.  But hey, we're a public school so give us a break.


The scalding happened but the mixture became very watery.  So I added my morning yogurt to it to thicken it up a bit.   But my mom, the kind lady that she is, gave me blueberries and raspberries in it as well.  Too bad I didn't realize this until after I had dumped the whole darn thing into the "cream."  So now we have watery blueberry raspberry creme brulee-ish. 


I did the water bath in the ramekins just like the real deal and everything!  And it actually turned out!! I mean the texture isn't quite the same creamy texture because the milk made it separate, but the flavor is really good.  So next time you want the luxury of this dessert without the calories, try this recipe.


Creme Brulee (ish)
makes 4 ramekins

3 egg yolks
1 1/2 teaspoons vanilla
3 Tablespoons sugar
1 1/4 cups half and half
1/4 cup whole milk
1/2 cup vanilla yogurt
berries (optional)

Scald cream and yogurt in a small saucepan over medium heat.
Mix eggs yolks, sugar, and vanilla in a small bowl.
Gradually pour cream into the egg mixture.  Add in berries.  Pour into ramekins.
Place in a 9 x 13 pan with about 1/2 inch of water in it.  Bake at 300 degrees for about 40 minutes.
Chill in refrdgerator over night.
Sprinkle brown sugar on top and broil in oven or with a torch.


Enjoy! (ish)


I definitely did :)

Monday, March 26, 2012

Banna Bread Two Ways

So it's Monday.  Yuck.  And I'm exhausted from the wedding weekend and my 18th birthday celebration that all I want to do is sleep.  Silly school, I can't wait to graduate and go to pastry school.  Then I can bake all the time!  I woke up and put my Kurieg to work with Caribou Coffee K-Cup.  Yum :)  I can't function without my morning cup (or cups:) ).

 My father is a very healthy man.  Every morning, he wakes up in the wee hours of the morning to exercise.  He lifts weights and runs and all sorts of healthy stuff, all before 7 am!  He also eats very healthily.  This morning he was eating his bran cereal with a banana when he noticed that our bananas were looking a little sad.  The brown spots out weighed the yellow and since there was a full bunch, I took some to school for a mid morning banana bread.  As I was walking out the door, my mom handed me some flax seed and some shredded coconut.  I'm not quite sure what her intentions were as she muttered something about pineapple and the tropics (spring fever maybe?) but I brought them along all the same.

I found a recipe on SimplyRecipes for a nut-less banana bread.  My mother didn't hand me any extra nuts so that's how I stumbled across this version.  I adapted it a little bit to call it my own.  Also, I wanted two loafs because I didn't have an hour to bake it, so I using two miniature pans.  After filling the first pan, I decided to add in the flax and the coconut just for fun.  That way, I would have an extra just in case the second tasted a tad off.  The end result was a crunchy, sweet crust with a moist yummy center.  It baked for a little under an hour and got considerably brown on top.  I turned my oven down to 275 degrees for the last 20 minutes.  I brought the loafs to lunch and I didn't even get a chance to take a picture of the final product! They were gone within minutes.


Banana Bread
makes one 4 by 8 in loaf pan or two 2 by 4 in pans
adapted from simplyrecipes


3-4 ripe bananas
1/3 cup melted butter
1 cup sugar (can be changed if you have less of a sweet tooth
1 egg, beaten
1 teaspoon vanilla
1 heaping teaspoon baking soda
1 teaspoon cinnamon
pinch of salt
1 1/2 cups all-purpose flour
2 Tablespoons flax seed (optional)
4 Tablespoons coconut (optional)

Preheat the oven to 350 degrees.  Melt the butter in a small saucepan.  Mash the bananas in a medium bowl and add in the melted butter.  Mix in the sugar, egg, vanilla, baking soda, cinnamon, and salt.  Slowly add the flour, 1/2 cup at a time.  Then add the flax and coconut if desired.  Mix well and bake for 55 minutes in a well-greased pan.

Enjoy!

Saturday, March 24, 2012

Three Desserts and A Wedding

Today, my dear friend and high school secretary got married and she was kind enough to ask me to do the desserts!  It was my first "gig" and I'd say it was a hit.  


I did desserts (and one surprise) for the reception.  The first dessert I decided on was a macaron of some sort because I always bring Mrs. Krebeihl the desserts I test in Culinary.  She tried one bite of a Nutella filled macron and fell in love!  So I created a dark chocolate strawberry macaron just for her special day.  


It was only my third time making these delicate confections so I was a tad nervous.  My first pan had cracked tops only because I used pans with edges on them.  Rookie mistake.  So I persevered and switched pans for the next two trays.  I had forgotten how many each batch of macarons makes!! 


It's a good idea to match up a bottom and a top before you even put the filling in a pastry bag so you don't have to hurry and find one that fits before you drop the whole thing.  


Filling a pastry bag is serious business.  It's hard to get sticky frosting in the bag and not all over your hands.  By sticking the tip-end of the bag in a tall glass, you can fold over the rest of the bag and fill it without having frosting spilling everywhere.  


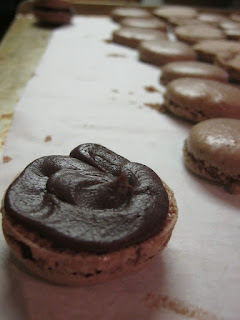
I decided to fill the chocolate shell with something rich, and chocolatey, and yummy.  Ganache.  So I infused the ganache with raspberry extract and it turned out phenomenal!  I also squished a half of a fresh raspberry inside just to intensify the flavor of the fruit.  


I took pictures along the assembly of the macarons so you can see just how easy it is (after the baking process).  

The shell.

A layer of raspberry infused ganache.

Half raspberry.

Squishing it.

A layer of ganache again to make sure the top sticks.

And thats it!

Next, I made the tiramisu cupcakes.  I used a recipe from Martha Stewart.  The result was a light fluffy cupcake topped with a light mascarpone frosting.  If I could go back in time, I would make the coffee that soaked the cake stronger and add more of it because it was muted by the frosting.  
I dusted the tops with a little cocoa powder.

And then I put them in these super cute liners to add to the elegance of the afternoon.

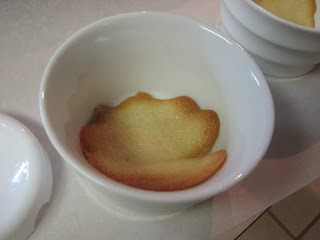
I originally wanted to make tuile cookie spoons but they turned out very, um, artistically.  Probably because I don't have a mold.  So then I turned to plan B.  I whipped up a light chocolate cookie that I made thin and crispy to contrast with the rich peanut butter mousse.

The color contrast is much better too.

She told me that the reason she asked me to do the desserts is because she didn't want a huge cake.  But I had to, it's what I do.  And it was her surprise.  So I made a chocolate Chianti infused cake with a Chianti Buttercream.  I decorated it with fondant flowers and ganache filled raspberries.  
I also added some silver luster dust and some silver edible pearls to bring some sparkle to the plate.
And thats the final product!
So we had this cake... 
these macarons...
these peanut butter mousse wafers...
and these cupcakes.  
I have already had the brides family asking for the recipes and I feel very proud of my first event.  Can't wait to do another!