Thursday, February 20, 2014

Shrimp with Spinach Coucous and Avocado Mango Salsa

Yesterday, the sun was shining so brightly! The air was light and you could almost smell spring trying to arrive.  Here in west Michigan, everyone was outside soaking up the sun's rays.  I was so inspired by the good turn of weather that I stopped at the store to make a summer-inspired dish.


 This light and healthy dish is perfect for dinner, especially if you are suffering by the brutally long winter we've been having.  I can imagine that this dish would be even more delicious if it's made on a grill.  I'll have to try it again once the weather is nicer.

 If you're a little intimidated by cooking, you should definitely give this recipe a try.  It's fairly simple and really hard to mess up.  The clean up is really easy too!  You'll need 2 bowls, some tin foil, and a sheet tray.


I found this recipe on Pinterest where I spend a lot of my free time.  I've recently been adding a lot of pins to my Clean Eating board which you should check out!!

Baked Shrimp with Couscous and Avocado/Mango Salsa
Yield: 4 servings

Ingredients

  • 8 cups baby spinach
  • 1 cup couscous
  • 1 lb medium shrimp, shelled and deveined
  • 1/2 cup chopped fresh cilantro, divided
  • 1 tablespoon extra-virgin olive oil
3/4 teaspoon salt, divided
  • 1 large mango, peeled and diced
  • 1 medium avocado, diced
  • 1 medium tomato, diced
  • 1 tablespoon fresh lemon juice

Preparation

Begin by tearing aluminum foil into large squares.  Spray each with cooking spray (I used Pam Olive Oil spray).  Pull up the edges to form a little boat.  Preheat your oven to 350 degrees, or use a grill heated to the same.

Place 2 cups of washed spinach in the bottom of each boat.  Mix the couscous with 1/4 cup of water to hydrate.  Place the couscous on top of the spinach, dividing evenly in each boat.  

Toss the shrimp, half of the cilantro, oil, and salt in a medium bowl.  I left the shell on the shrimp which is optional but be sure to de-vein the shrimp.  Place the shrimp next to the couscous in each boat.

Fold up the edges and crimp to seal each boat.  Place on a sheet tray and bake for about 15 minutes or until the shrimp is fully cooked. 

While the boats are in the oven, mix the mango, avocado, tomato, salsa and the rest of the cilantro.  Drizzle lemon juice on top.

Empty the contents onto a plate and toss everything together.  Top with the salsa and enjoy!!!

Thursday, February 6, 2014

USA-Inspired Cupcake Torches

 If you've even turned on your TV during the past the couple weeks, I'm sure you are well aware that the 2014 Winter Olympics in Russia are fast approaching! The opening ceremony is tonight, and it's always quite the production.  Let's just keep our fingers crossed that it won't be as disappointing as the Super Bowl was this year.


 I don't know about you guys, but I can remember sitting in front of the TV with my head tilted back about 45 degrees, my mouth open, gazing as the incredible athletes showcased their talent.  I would be captivated for hours by the ice-skaters especially; their grace, fluidity, and poise stunning me.  I love to watch the Olympics and I've created this treat just for the opening ceremony!!  Because who doesn't love to eat while watching professional athletes workout?

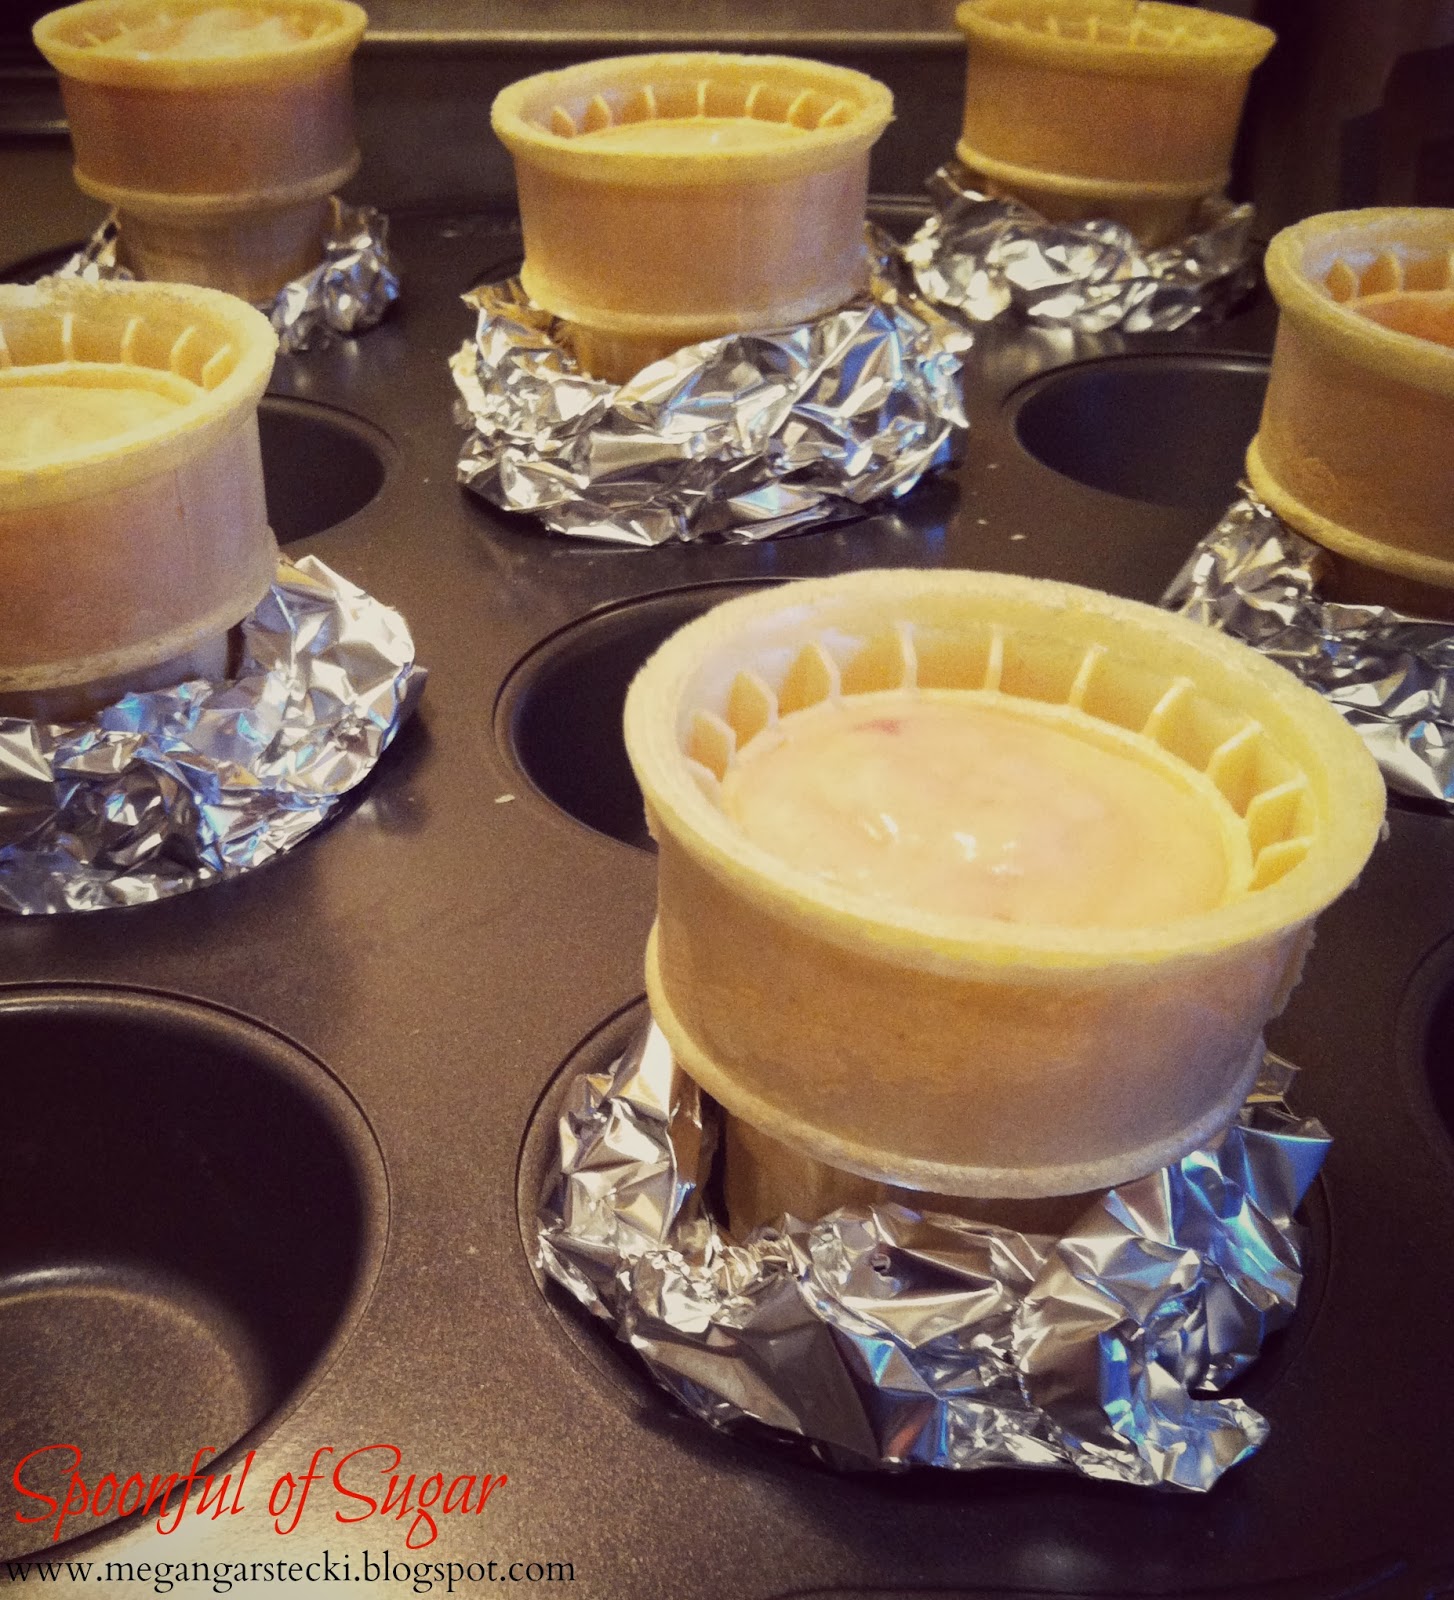
 I came up with this idea when I saw a photo in the last edition of the Food Network Magazine (which I love).  I took their idea and added my own little twist on it.  And so, I present to you, USA Torch Cupcakes!!  In order to achieve the "torch-like" look, I baked cupcakes in ice cream cones.  You can find these cones in virtually any grocery store.  To represent the great USA, I made strawberry cupcakes and filled them with a blackberry/raspberry jam, and topped them with fresh whipped-cream buttercream to mimic the red, blue, and white colors of our flag.

 Begin by preparing the cupcake batter.  Set up the cones in a cupcake pan by rolling aluminum foil into circles to stabilize the cones during baking.


 Fill the cones to the inner ring of the cone.  Tap each cone slightly on the table to settle the batter and refill the cones.


  Bake at 350 degrees for about 25 minutes or until the cupcakes spring back when touched.  Let cool, fill with jam, and then top with the buttercream.  Ta-Da!!

Strawberry Cupcakes (recipe adapted from Sally's Baking Addiction)

Ingredients:
 1 2/3 cup all-purpose flour
 1/2 teaspoon baking powder
 1/4 teaspoon baking soda
 1/2 teaspoon salt
 1/2 cup unsalted butter, melted
 1 cup granulated sugar
 1 large egg
 1/4 cup yogurt (strawberry yogurt would be ideal but greek yogurt works too)
 3/4 cup skim milk
 1/2 cup diced strawberries
 2 tablespoons strawberry juice (get this by mashing the berries a little bit and then straining them)

Process:
 (1) Preheat oven to 350 degrees.  Whisk melted butter with sugar until fully incorporated.  Add the egg, yogurt, and milk and whisk thoroughly.
 (2) Slowly add in flour, baking powder, baking soda, and salt.  Mix until combined.
 (3) Fold in the strawberries and juice, mixing only until just combined.
 (4) Bake for 25 minutes.
 (5) Fill a pastry bag with jam.  Once the cupcakes are cooled, insert the tip into the cupcake and squeeze slowly while pulling up to fill the cupcake.  
 Note: These cupcakes will be very moist due to the strawberries.


Whipped-Cream Buttercream

Ingredients:
 2 cups softened butter
 4 cups powdered sugar
 3 tablespoons heavy cream

Process:
 (1) In a stand mixer fitted with a whip attachment, whip the butter until it lightens in color, about 2 minutes. 
 (2) Add in the powdered sugar half a cup at a time, making sure to mix thoroughly.
 (3) Add the heavy cream and whip for 2 minutes.


Enjoy!

Sunday, February 2, 2014

Super-Light Gameday Favorites

 The number one resolution made on January 1, 2014 was to lose weight.  Like most of America, I also made the resolution to get fit.  But unlike most people, I decided to approach the new year aiming to get healthy instead of just losing weight.  Interestingly enough, staying fit and healthy was number 5 on the list of the top ten resolutions (according to the University of Scranton).  I kinda caught the nutrition bug when I started taking a nutrition class at Grand Rapids Community College and I love it! Nutrition is a really interesting field to explore.  Since I'm in the Secchia Institute program, we are focusing on how we, as chefs, can create meals that are balanced and full of nutritious foods that customers will actually order off of a menu.

Photo courtesy of nationalharbor.com

 Many people only stick to their resolutions during the first couple weeks or so and most people don't even make it through January.  I wonder why people give up so easily? Maybe its because of all the fad diets that don't provide you with a balanced diet.  If you aren't consuming a diet consisting of protein, fats, and yes carbs, you are bound to begin to feel lethargic.  As I was flipping through the January/February 2014 issue of the Food Network Magazine, I came across the In the Know section which contained a very interesting fact.  The Food Network did a poll on Facebook and found that chocolate is the number one temptation for people to stop their resolutions.  That isn't that hard to believe though, I love chocolate!  But as long as we eat it in moderation, or with a balanced diet paired with physical activity its okay!

Keep checking the blog to see an upcoming post about this crowd pleasing favorite Chocolate Peanut Butter Cake!

 To help me stay on track, I downloaded this free app, myFitnessPal.  They have apps for both Apple and Android phones.  The set up is simple, just put in your height and weight and how much you either want to gain or lose (because everyone wants to gain weight).  It will then give you a recommended calorie count for each day in order for you to achieve your goal.  I simply plug in what I'm eating each day for breakfast, lunch, dinner, and snacks and it calculates how many total calories I've eaten.  Also, if I made it to the gym that day, I can easily look up the elliptical exercise on the cardio tab and plug in the number of minutes I did.  I really like it because it subtracts the calories you exercised from what you've eaten, allowing you to eat more!  Then, at the end of each day, you click the "finish logging for today" button, and it will tell you that if everyday was like today, you would weigh this many pounds in 5 weeks.  I've been sticking to this for about 2 weeks and I've already lost 2 pounds!

 It's really important to me that I stick to this healthy regime because summer is coming soon and I'm ready for some warmer weather! With the Superbowl being today and all, it can be hard to say no to the hot wings and seven layer taco dips and piled-high nachos.  I scoured Pinterest and Google looking for healthier options that I could complete last-minute, since I started looking yesterday. After scrolling for hours, and many debates with my guy about what everyone will actually eat and like, we decided on a taco bar! I don't know why I didn't think of this sooner!  It was an especially good idea because Meijer has a lot of specials going on for the Superbowl.

Photo Courtesy of tireball.com

 Heres some tips to help you have an awesome taco bar at your party!


 -Get lean ground beef, preferably 90-10 ratio.  It's an easy way to cut down on calories without sacrificing taste because of the taco seasoning.
 -If you're like me (a college student with her very first apartment) you probably don't have all of the necessary individual spices for taco meat just laying around.  Thats why I got a taco seasoning package which has just enough for our taco meat today and only cost 54 cents!
 -Buy a head of lettuce instead of precut mixes.  It doesn't take much lettuce to complete a taco bar and a head of lettuce is usually at least half the price of the mixes.
 -We chose the smaller variety of taco shells because they are only 110 calories for 2 shells (and they were on sale!).
 -You can do a lot of prep work ahead of time.  For example, I diced the tomatoes, minced some onions, shredded some lettuce, and cutting up carrots, celery, and broccoli to add some healthier options instead of chips with our tacos, last night.


In terms of actually setting up the taco bar, there are many different ways to arrange your toppings.  I saw a really cute idea on Pinterest! They saved jars from items like pickles and salsa, washed them out, removed the stickers, and put their fresh ingredients, like tomatoes and onions, inside with a spoon.  For other ideas for taco bars as well as other themed parties, check out my Party Ideas board or my Game Day board on Pinterest!  Above is how our taco bar turned out.  I'm sure that if I planned a little more in advance, I could've made it a little prettier but its okay because it tasted great!  And most of all, be sure to enjoy the game with those you love.
Enjoy!