Showing posts with label chocolate. Show all posts

Friday, January 30, 2015

Yummy Granola and My New Favorite Cookbook

I love granola.  It's one of my core food groups.  For the longest time, I would buy that Nature Valley chocolate protein granola which I would mix with dried cranberries and more chocolate chips (you would too).  It was so sweet that I would often eat it in place of dessert and it helped me get my protein for the day since some days I don't eat meat (college student problems).  Then it dawned on me; I could make this for so much cheaper! I found this recipe in a wonderful cookbook that I received for Christmas this year.  The author is also a fellow blogger and you should definitely check out her site!

I literally carry a huge bag of this yummy snack around with me everywhere so I always have a healthy option for snacking.  Plus, then I am less inclined to head to the vending machine.  Also, the flax meal in this recipe really helps out the ol' digestive system if you know what I mean.  I have made this recipe twice since I began writing this blog post! I think I'm going to go through at least a bag a week!


Seriously, if you make nothing else from this blog, which I hope isn't the case I mean just check out this  yummy recipe, you have to make this granola.  I have a batch in the oven as we speak and it smells divine!! It's so versatile too because you can add whatever dried fruits or nuts or seeds you want to make it yummy for you.  Plus, it's can easily become gluten free by using gluten free oats. And, its only 150 calories for 1/4 cup.

Oatmeal Cookie Granola (Recipe courtesy of Jessica Merchant Seriously Delish Cookbook)
yields 4 cups

2 1/4 cups old-fashioned rolled oats
1 cup sliced almonds
1/2 cup ground flaxseed
1 tablespoon brown sugar
1 teaspoon cinnamon
1/4 teaspoon salt
1/2 cup honey
2 tablespoons butter
2 tablespoons coconut oil
1/2 cup chocolate chips

(1) Preheat the oven to 325 degrees.
(2) In a large bowl, combine the first six ingredients.
(3) Melt the rest of the ingredients besides the chocolate chips in a small saucepan.
(4) Pour the melted ingredients over the oats and toss to combine.
(5) Bake for 30 minutes tossing several times during the baking process.
(6) Toss in the chocolate chips and let cool.

Happy Snacking!

Saturday, March 24, 2012

Three Desserts and A Wedding

Today, my dear friend and high school secretary got married and she was kind enough to ask me to do the desserts!  It was my first "gig" and I'd say it was a hit.  


I did desserts (and one surprise) for the reception.  The first dessert I decided on was a macaron of some sort because I always bring Mrs. Krebeihl the desserts I test in Culinary.  She tried one bite of a Nutella filled macron and fell in love!  So I created a dark chocolate strawberry macaron just for her special day.  


It was only my third time making these delicate confections so I was a tad nervous.  My first pan had cracked tops only because I used pans with edges on them.  Rookie mistake.  So I persevered and switched pans for the next two trays.  I had forgotten how many each batch of macarons makes!! 


It's a good idea to match up a bottom and a top before you even put the filling in a pastry bag so you don't have to hurry and find one that fits before you drop the whole thing.  


Filling a pastry bag is serious business.  It's hard to get sticky frosting in the bag and not all over your hands.  By sticking the tip-end of the bag in a tall glass, you can fold over the rest of the bag and fill it without having frosting spilling everywhere.  


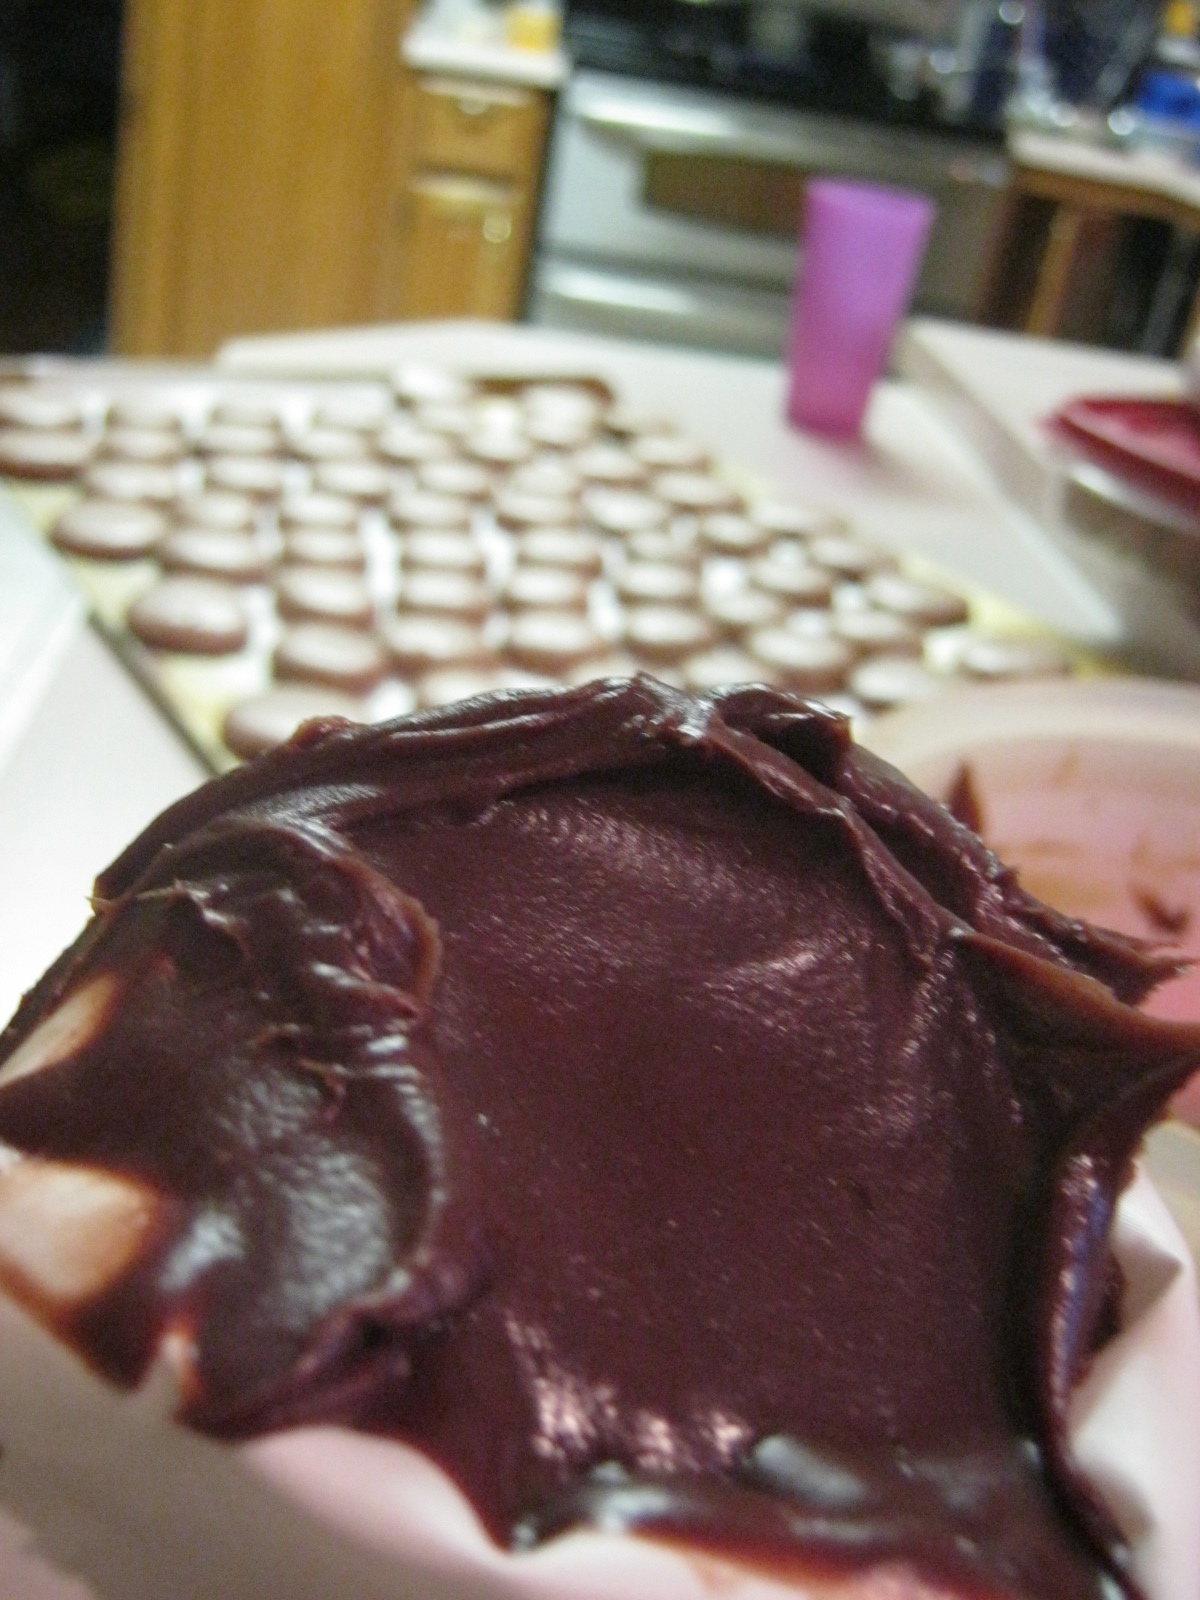
I decided to fill the chocolate shell with something rich, and chocolatey, and yummy.  Ganache.  So I infused the ganache with raspberry extract and it turned out phenomenal!  I also squished a half of a fresh raspberry inside just to intensify the flavor of the fruit.  


I took pictures along the assembly of the macarons so you can see just how easy it is (after the baking process).  

The shell.

A layer of raspberry infused ganache.

Half raspberry.

Squishing it.

A layer of ganache again to make sure the top sticks.

And thats it!

Next, I made the tiramisu cupcakes.  I used a recipe from Martha Stewart.  The result was a light fluffy cupcake topped with a light mascarpone frosting.  If I could go back in time, I would make the coffee that soaked the cake stronger and add more of it because it was muted by the frosting.  
I dusted the tops with a little cocoa powder.

And then I put them in these super cute liners to add to the elegance of the afternoon.

I originally wanted to make tuile cookie spoons but they turned out very, um, artistically.  Probably because I don't have a mold.  So then I turned to plan B.  I whipped up a light chocolate cookie that I made thin and crispy to contrast with the rich peanut butter mousse.

The color contrast is much better too.

She told me that the reason she asked me to do the desserts is because she didn't want a huge cake.  But I had to, it's what I do.  And it was her surprise.  So I made a chocolate Chianti infused cake with a Chianti Buttercream.  I decorated it with fondant flowers and ganache filled raspberries.  
I also added some silver luster dust and some silver edible pearls to bring some sparkle to the plate.
And thats the final product!
So we had this cake... 
these macarons...
these peanut butter mousse wafers...
and these cupcakes.  
I have already had the brides family asking for the recipes and I feel very proud of my first event.  Can't wait to do another!


Friday, February 10, 2012

Jumbo Chocolate Chip Cupcakes-SC #10


I had just gotten home from the basketball game, and I was in the mood for something just a little bit chocolate-y.  But the only thing I could find, was chocolate chips!  I flipped through the Scrumptious Cupcakes book and found this recipe.  This is great if you just want a little chocolate, not like triple chocolate cookies or anything.  I added an additional 1/4 cup of chocolate chips because the 1/2 cup looked lonely.  I did find that this recipe's batter isn't quite thick enough because most of the chip sunk towards the bottom.  This might have been my fault because I added more, but the flavor is still great.  Also, I made it truly jumbo by baking it in a 6-hole cupcake tin that has giant holes, perfect for these cupcakes.  Just make sure you watch the time as it will be a little longer than the regular size.


Jumbo Chocolate Chip Cupcakes
makes 8

7 Tbsp butter
1/2 cup sugar
2 large eggs
3/4 cup self-rising flour
1/2 cup chocolate chips

Preheat oven to 375 degrees.  Line your muffin tin size of choice.  

Place butter, sugar, eggs, and flour in a large bowl and beat together until just smooth.  Fold in the chocolate chips.  Spoon the batter into the paper liners.

Bake for 20-25 minutes or until well risen.  Transfer to a wire rack to cool completely.

Enjoy!


Recipe courtesy of Parragon Books Ltd.

Tuesday, January 31, 2012

Nutella Gooey Butter Cake

Happy World Nutella Day!


Actually, the official day is this Sunday, February 5, 2012, but it's the Superbowl so I'm celebrating it early.  This cake is wonderful, it's amazingly simple to make and is so gooey and chocolatey, you'll be making it year-round.  My culinary teacher found this recipe from a blog called Plain Chicken, which after some research, I found has multiple recipes using Nutella, so maybe I'll dip into those concoctions as well.  I made this in my Culinary Arts class and the whole class was begging for a piece before it even came out of the oven.  You'll feast with your nose before you devour your piece.  Sorry that I don't have any pictures of the actual cake, but it got eaten so fast I didn't even have time to snap a single picture!

Nutella Gooey Butter Cake
make one 9 by 13 pan

Cake
1 (18 1/4 oz) package devil's food cake mix
1 egg
8 Tbsp butter, melted

Filling
1 (8 oz) package cream cheese, softened
1 cup Nutella
3 eggs
1 tsp vanilla
8 Tbsp butter, melted
1 (16 oz) box powdered sugar

Preheat oven to 350 degrees.  Combine the cake mix, egg, and butter and mix well with an electric mixer.  Pat the mixture into the bottom of a lightly greased 13 by 9 pan.

To make the filling, beat the cream cheese and Nutella in a large bowl and mix until smooth.  Add the eggs, vanilla, and butter and beat together.  Next, add the powdered sugar and mix well.  Spread the Nutella mixture over cake batter and bake for 40 to 50 minutes.  Make sure not to over bake as the center should be a little gooey.

Recipe courtesy of www.plainchicken.blogspot.com

Sunday, January 29, 2012

Double Dose of Cupcakes-SC#6 & #7

Tonight there is an all new Cupcake Wars on!!! And it's about the show I Love Lucy!!  I DO love Lucy!! And that show.  Can you tell?


So naturally, since I consider myself a baker and all, I made some cupcakes.  Who doesn't always crave whatever food they see while watching a show on the Food Network?  My point exactly.  So I first made Chocolate Orange Cupcakes, and then proceeded to make Warm Strawberry Cupcakes.  They were making cinnamon cupcakes on the show for one of the rounds, but there wasn't a recipe for that in Scrumptious Cupcakes so I was out of luck.  But on the bright side, I knocked out two recipes today!!  But my kitchen was full of dirty dishes!


A few notes for the Chocolate & Orange Cupcakes;


  • Make sure the chocolate you use for the topping is sweetened!! Mine was not so that's why my frosting isn't as shiny as it's supposed to be.
Notes for the Warm Strawberry Cupcakes Baked in a Teacup;

  • Use homemade preserves, it make a huge difference in the taste.
  • You can also use ramekins instead of teacups, but use a tad more preserves in the bottom. 
Chocolate & Orange Cupcakes
makes 16


1/2 cup butter, softened
generous1/2 cup superfine sugar
finely grated rind and juice of 1/2 orange
2 eggs, lightly beaten
generous 3/4 cup self-rising flour
1 oz dark chocolate, grated
thin strips of candied orange peel, to decorate (I used freshly grated orange peel because I didn't have                 time to candy it)

Preheat the oven to 350 degrees.  Line two muffin tins with 16 paper liners.

Put the butter, sugar, and orange rind in a bowl and beat together until light and fluffy.  Gradually beat in the eggs.  Sift in the flour and fold gently into the mixture with the orange juice and the grated chocolate.  Spoon into the paper liners.

Bake for 20 minutes, or until well risen and springy to the touch.  Transfer to a wire rack and let cool.


4 oz dark chocolate, broken into pieces
2 Tbsp of unsalted butter
1 Tbsp dark corn syrup

To make the frosting, break the chocolate into a heatproof bowl and add the butter and syrup.  Set the bowl over a saucepan of simmering water until melted.  Remove from the heat and stir until smooth.  Spread over cupcakes and decorate each with a few strips of orange peel.  Let set.


Enjoy! (Like I did hehe)


Warm Strawberry Cupcakes Baked in a Teacup
makes 6


1/2 cup butter, softened, plus extra for greasing
1/4 cup strawberry preserve
generous 1/2 cup superfine sugar
2 eggs, lightly beaten
1 tsp vanilla extract
generous 3/4 cup self-rising flour
6 whole strawberries for decorating
confectioners' sugar for dusting

Preheat the oven to 350 degrees.  GRease six ovenproof dishes with butter.  Spoon 2 teaspoons of the strawberry preserve into the bottom of each teacup.

Place the butter and sugar in a large bowl and beat together until light and fluffy.  Gradually add the eggs, beating well after each addition, then add vanilla extract.  Sift the flour and fold into the batter.  Spoon the batter into the teacups.


Stand the cups in a roasting pan, then pour enough hot water to come up 1/3 the sides of the cups.  Bake for 40 minutes, or until well risen and springy to the touch.  If over browning, cover the cupcakes with tin foil.  Let cool for 2-3 minutes, then carefully lift from pan and place on saucers.

Top each cupcake with a strawberry, then dust with sugar and serve warm.

Enjoy!


Recipe courtesy of Parragon Books Ltd.

Friday, January 27, 2012

Mocha Cupcakes with Whipped Cream-SC #5

This recipe is quite different from the other recipes in this collection.  It uses several techniques I was not familiar with, but I'm so glad I am now.


I highly recommend you try your hand at these too because they are so worth it.  If you do accept the challenge of creating these masterpieces, please know that this took me almost 2 hours.  I know, that's a long time just to make 20 cupcakes, but the whole process with take some time.  Remember this when planning for this recipe.  Also, put topping on COMPLETELY cool cupcakes, otherwise you will ruin all that whipping you just did.  And only apply the topping when you are just about to serve it.  Here's a few notes on the recipe:
  • The mixture that you bring to a boil will take longer than you expect, but be patient.  
  • Cool this at room temperature.  I know it take longer than popping it in the fridge for a little bit, but the fridge with cause it to create a skin and that is not good.
  • Watch them carefully, mine were done in exactly 15 minutes.
  • Be patient when you are whipping the cream, it takes time.  And please use a mixer; you might break your arm.
  • To add a slight sweetness to the whipped cream, add about one teaspoon of sugar.


Mocha Cupcakes with Whipped Cream
makes 20

2 Tbsp instant espresso coffee powder (or one pkg of Starbucks Via)
6 Tbsp butter
1/2 cup superfine sugar
1 Tbsp honey (or really high quality maple syrup)
generous 3/4 cup water
1 2/3 cup all-purpose flour
2 Tbsp unsweetened cocoa
1 tsp baking soda
3 Tbsp milk
1 large egg, lightly beaten.

Preheat oven to 350 degrees.  Line muffin tins with 20 paper liners.

Place the coffee powder, butter, sugar, honey, and water in a saucepan and heat gently, stirring until the sugar has dissolved.  Bring to a boil, then reduce the heat and let simmer for 5 minutes.  Pour into a large heatproof bowl and let cool.

When the mixture has cooled, sift in the flour and cocoa.  Placce the baking soda and milk in a bowl and stir to dissolve, then add to the mixture with the egg and beat together until smooth.  Spoon the batter into the paper liners.

Bake for 15-20 minutes, or until well risen and springy to the touch.  Transfer to a wire rack to cool completely.

1 cup whipping cream
unsweetened cocoa for dusting

For the topping, place the cream in a bowl and whip until it holds its shape.  Spoon heaping teaspoonfuls of cream on top of each cupcakes, then dust lightly with sifted cocoa.  Enjoy!


Recipe courtesy of Parragon Books Ltd.

Sunday, January 22, 2012

Suprise!!!! Chocolate Pudding Cake

I love surprise parties!!!!  And so I'm taking a momentary break from baking through the Scrumptious Cupcakes book.


Last night my friends and family threw a surprise party for my guy who just turned 18 on January 18th!! It's a golden birthday!!! So we decorated in all blue and yellow ( his favorite team is Michigan) and we had a great time.


I, of course, made the cake (and we bought a cake from Dairy Queen but shhh.... I haven't figured out how to make ice cream cake yet ).


It was quite the cake to make.  Granted, I started the process Friday night at nine thirty, but I had to work earlier that day so it was the only chance I had.


There he is, blowing out his 18 candles.

I found this recipe in the 2008 edition of The Best of America's Test Kitchen.  I highly recommend exploring one of these fine cookbooks because they house incredible recipes, both sweet and savory.

If you happen to have a copy of this book nearby, please flip to page 260 to see the glorious cake this post is all about.  Looks pretty right?  Then flip to page 291 for the recipe.  Yes, you did read that right, it calls for homemade pudding.  Jell-o is doing something right because mine is chocolate milk. So instead I whipped up one of the instant packages and it made just enough pudding to cover and fill in between the layers.  But it turned out just fine :)

Saturday, January 14, 2012

Chocolate Molten Cupcakes-SC #3


This recipe is from the section in the bake book commonly known as the Chocolate Box, my favorite place in the world.


I made this as I was watching Miss America because, let's face it, those girls do not enjoy baked goods.  Clearly I do, and so, as I watched them parade around in bikinis and high heels, I treated myself to these chocolate cupcakes with a warm molten center; it was much more gratifying.


Don't they just look delightful?


Trust me, they were.


A couple notes about the recipe:


  • Put more batter in the bottom before placing the chocolate to keep it from sinking and burning the bottom.
  • Dove works very well with the flavor of the cake.
  • They will be done in exactly 20 minutes ( at least with my oven) so watch them carefully


Warm Molten-Centered Chocolate Cupcakes
makes 6

4 Tbsp butter, softened, or soft margarine
1/4 cup superfine sugar
1 large egg
2/3 cup self-rising flour
1 Tbsp unsweetened cocoa
2 oz semisweet chocolate ( I used a Dove chocolate instead )
confectioners' sugar, for dusting

Preheat the oven to 375 degrees.  Line a muffin pan with 6 liners.

Place butter, sugar, egg, flour, and cocoa in a large bowl and beat until just smooth.  DO NOT OVER BEAT.  Spoon half of the batter into the paper liners.  Using a spoon, make an indentation in the center of each cake.  Place a piece of chocolate in the center, and then spoon the remaining batter on top.

Bake for 20 minutes or until we risen.  Let the cupcakes stand in the pan for 2-3 minutes before serving warm, dusted with sifted confectioners' sugar.


Recipe courtsey of Parragon Books Ltd.