So I'm getting married!! I can't believe that I get to marry my best friend in the whole entire world! He's just the best. And we've been starting the planning process which is kind of difficult once school started a couple weeks ago. But this morning we had time to meet up with his parents and look at a couple venue options. And the excitement continued!
Today is also the first Sunday night football night of the season too. And since the Lions were playing today, we had to have some great grub. Since we were gone all morning, I put a pork shoulder in the crockpot. It was really simple but it tasted so good! I added a can of beef broth, about a cup of apple cider, some good barbecue sauce, and a cup of water. It simmered for about 5 hours and them I removed about 4 hours of liquid and reduced it on the stove. I added some more barbecue sauce and reduced it back down to the thickness of regular sauce. I also made pasta salad and some brownies with peanut butter frosting. Yum!
What a great sunday!
Sunday, September 13, 2015

Friday, January 30, 2015
Yummy Granola and My New Favorite Cookbook
I love granola. It's one of my core food groups. For the longest time, I would buy that Nature Valley chocolate protein granola which I would mix with dried cranberries and more chocolate chips (you would too). It was so sweet that I would often eat it in place of dessert and it helped me get my protein for the day since some days I don't eat meat (college student problems). Then it dawned on me; I could make this for so much cheaper! I found this recipe in a wonderful cookbook that I received for Christmas this year. The author is also a fellow blogger and you should definitely check out her site!
I literally carry a huge bag of this yummy snack around with me everywhere so I always have a healthy option for snacking. Plus, then I am less inclined to head to the vending machine. Also, the flax meal in this recipe really helps out the ol' digestive system if you know what I mean. I have made this recipe twice since I began writing this blog post! I think I'm going to go through at least a bag a week!

Seriously, if you make nothing else from this blog, which I hope isn't the case I mean just check out this yummy recipe, you have to make this granola. I have a batch in the oven as we speak and it smells divine!! It's so versatile too because you can add whatever dried fruits or nuts or seeds you want to make it yummy for you. Plus, it's can easily become gluten free by using gluten free oats. And, its only 150 calories for 1/4 cup.
Oatmeal Cookie Granola (Recipe courtesy of Jessica Merchant Seriously Delish Cookbook)
yields 4 cups
2 1/4 cups old-fashioned rolled oats
1 cup sliced almonds
1/2 cup ground flaxseed
1 tablespoon brown sugar
1 teaspoon cinnamon
1/4 teaspoon salt
1/2 cup honey
2 tablespoons butter
2 tablespoons coconut oil
1/2 cup chocolate chips
(1) Preheat the oven to 325 degrees.
(2) In a large bowl, combine the first six ingredients.
(3) Melt the rest of the ingredients besides the chocolate chips in a small saucepan.
(4) Pour the melted ingredients over the oats and toss to combine.
(5) Bake for 30 minutes tossing several times during the baking process.
(6) Toss in the chocolate chips and let cool.
I literally carry a huge bag of this yummy snack around with me everywhere so I always have a healthy option for snacking. Plus, then I am less inclined to head to the vending machine. Also, the flax meal in this recipe really helps out the ol' digestive system if you know what I mean. I have made this recipe twice since I began writing this blog post! I think I'm going to go through at least a bag a week!
Seriously, if you make nothing else from this blog, which I hope isn't the case I mean just check out this yummy recipe, you have to make this granola. I have a batch in the oven as we speak and it smells divine!! It's so versatile too because you can add whatever dried fruits or nuts or seeds you want to make it yummy for you. Plus, it's can easily become gluten free by using gluten free oats. And, its only 150 calories for 1/4 cup.
Oatmeal Cookie Granola (Recipe courtesy of Jessica Merchant Seriously Delish Cookbook)
yields 4 cups
2 1/4 cups old-fashioned rolled oats
1 cup sliced almonds
1/2 cup ground flaxseed
1 tablespoon brown sugar
1 teaspoon cinnamon
1/4 teaspoon salt
1/2 cup honey
2 tablespoons butter
2 tablespoons coconut oil
1/2 cup chocolate chips
(1) Preheat the oven to 325 degrees.
(2) In a large bowl, combine the first six ingredients.
(3) Melt the rest of the ingredients besides the chocolate chips in a small saucepan.
(4) Pour the melted ingredients over the oats and toss to combine.
(5) Bake for 30 minutes tossing several times during the baking process.
(6) Toss in the chocolate chips and let cool.
Happy Snacking!
Sunday, December 28, 2014
Chocolate Chianti Cake
I hope everyone had a wonderful Holiday season! My waistline and I both thoroughly enjoyed our time with family and friends, eating away the days with delicious treats. Alas, we all have to return to the real world eventually. As I try to get back into the swing of things, I find myself preparing for the year ahead. This year, this involves getting ready for a beautiful wedding between two amazing people who I went to high school with. Unfortunately, their taste buds haven't had the pleasure of tasting any of my confections yet so I'm holding a little cake tasting for them. This is fun, not only for them, but also for me because I get to make a couple different kinds of cake and frostings and fillings! I hope they can find a combination that they love!

One of the combinations I made for them is this Chocolate Chianti Cake. Have you ever had chianti? It's a red wine, that has fruity notes to it and pairs really well with chocolate. I first made this cake when I created a wedding cake for two back in high school. This recipe is adapted from the wonderful Sprinkle Bakes blog which I love and read regularly. She made cupcakes but it works just as well in a cake form. And what can be more romantic at a wedding than a fruity chocolate wine cake? I hope they like it! Apparently my family also enjoyed eating the extras.

One of the combinations I made for them is this Chocolate Chianti Cake. Have you ever had chianti? It's a red wine, that has fruity notes to it and pairs really well with chocolate. I first made this cake when I created a wedding cake for two back in high school. This recipe is adapted from the wonderful Sprinkle Bakes blog which I love and read regularly. She made cupcakes but it works just as well in a cake form. And what can be more romantic at a wedding than a fruity chocolate wine cake? I hope they like it! Apparently my family also enjoyed eating the extras.
Tuesday, October 7, 2014
Apple Pie Overnight Oats
As I progress through my education in the culinary industry, I am learning more and more about the problems that affect our food. It's crazy to me how little we know about our food and where it comes from, not to mention what is actually in it. Many people are adapting the "Clean Eating" principle to their eating habits. If you're curious about what exactly clean eating entails, check out this great article at The Gracious Pantry.
Personally, I'm getting there slowly. It's hard on my budget to completely change the way I eat all at once. Plus, there's lots of information out there so I need to do some more research on the products that are considered "healthy." As I continue learning more about nutrition and diets, I can ponder the perils of our food supply as I fill my belly with a great easy and tasty breakfast dish. It's super easy especially when you'd rather sleep in than make a good balanced breakfast. I got the idea for this recipe from Lauren Conrad but I adapted it to celebrate the beautiful fall weather we've been enjoying.

Apple Pie Overnight Oats
makes one serving
1/2 cup old-fashioned or steel cut oats
1/2 cup greek yogurt (I used Fage)
1/2 cup almond milk (I used Silk light)
1 small organic apple, diced
1 teaspoon apple pie spices (I had a spice mix but it included cinnamon, nutmeg, allspice)
1 teaspoon honey
I usually make this in a pint mason jar because it's reusable and you don't get those pesky chemicals that leach out of some plastic products. I start by measuring out the oats, greek yogurt, and almond milk. I mix all of that together and then add the spices and honey. Make sure you taste it at this point to make sure the flavor balance is good. Then I add in the apples.
You can easily adapt this recipe to fit your mood. I really like having whole fruit in mine just to add a different texture component but you can easily use a puree or omit it all together. You do have to make sure that you make this the night before so that the oats can absorb all of the liquids to make a thickness similar to hot oats. I like mine a little thicker, but you can play with the amount of almond milk to adjust the thickness. Also, you can definitely use regular milk or even soy milk, whatever your heart desires!
Nutritional Facts
414 calories
67 grams carbs
4 grams fat
30 grams protein
36 grams sugar
Happy Breakfasting!
Wednesday, May 28, 2014
Grapefruit Cupcakes
Grapefruits are one of those items that you have such big ideas for in the grocery store, but once you get them home, they sit in your crisper for a week or two before you remember that you were going to eat a half everyday. There are many health benefits to grapefruits that many people aren't aware of. It contains lots of Vitamin C which helps support your immune system. In addition to Vitamin C, it also contains Vitamins A, K, and E as well as thiamin, riboflavin, niacin, Vitamin B6, and folate. If you are on any medication however, talk to your doctor to make sure that grapefruit won't affect your medicine, as it can interfere with many prescribed medications. Packed with healthful nutrients and full of fiber which helps you feel full and satisfied? I'm definitely going to dig mine out of my crisper drawer.

If you're purchasing grapefruits that are grown in Texas or Florida, they are in season from October to June, which means they're in their peak!! And with the weather we've been having in Grand Rapids recently, what could be better than grapefruit cupcakes?? I found this delicious recipe in the May issue of the Food Network Magazine. The garnish on my cupcakes can be found in step by step instructions in the magazine. I tweaked the recipe (as I always do) because I don't have elderflower liqueur on hand, and I'm not quite sure where to find it as of yet. However, I think they came out great!

Grapefruit Cupcakes (Recipe courtesy of the May 2014 Issue of Food Network Magazine)
Makes about 12 cupcakes

Ingredients
1 1/2 cups all-purpose flour
1 1/2 teaspoons baking powder
1/4 teaspoon salt
1 stick unsalted butter, softened
1 cup granulated sugar
2 large eggs, at room temperature
1 teaspoon vanilla extract
1 tablespoon grapefruit zest
1/2 cup milk
Process
1. Preheat your oven to 350 degrees. Beat the butter and sugar together in a mixer. Use speed 2, or medium speed and beat for 5 minutes. This step is super important because this is where you get some of your height. The butter mixture should look white when done. Beat in eggs one at a time.
2. Beat in vanilla and grapefruit zest. Add the baking powder, salt, and 1/2 cup of the flour to the butter mixture. Add 1/4 cup of the milk. Add another 1/2 cup of flour followed by the rest of the milk. Finish with the remaining 1/2 cup flour and mix until just combined. Take care to not over mix this batter as it will result in cupcakes with tunneling, which is an unattractive crumb on the inside.
3. Divide into lined cupcake tins and fill 2/3 of the way full. Mine baked for exactly 17 minutes and were perfectly done without being too golden brown.
Grapefruit Buttercream
Frosts about 12 cupcakes
 Ingredients
1 stick unsalted butter, softened
3 cups powdered sugar
2 drops red food coloring, water-based
1 tablespoon grafruit zest
2 tablespoons milk
Process
1. Begin by beating the butter until fluffy. If your butter is too melty, it won't fluff as much as you want. Make sure you leave your butter out about 2 hours before, but no longer.
2. Add the rest of the ingredients as well as about a tablespoon of grapefruit juice. Beat well until light and fluffy. Spread on top of cupcakes.
If you're purchasing grapefruits that are grown in Texas or Florida, they are in season from October to June, which means they're in their peak!! And with the weather we've been having in Grand Rapids recently, what could be better than grapefruit cupcakes?? I found this delicious recipe in the May issue of the Food Network Magazine. The garnish on my cupcakes can be found in step by step instructions in the magazine. I tweaked the recipe (as I always do) because I don't have elderflower liqueur on hand, and I'm not quite sure where to find it as of yet. However, I think they came out great!
Grapefruit Cupcakes (Recipe courtesy of the May 2014 Issue of Food Network Magazine)
Makes about 12 cupcakes
Ingredients
1 1/2 cups all-purpose flour
1 1/2 teaspoons baking powder
1/4 teaspoon salt
1 stick unsalted butter, softened
1 cup granulated sugar
2 large eggs, at room temperature
1 teaspoon vanilla extract
1 tablespoon grapefruit zest
1/2 cup milk
Process
1. Preheat your oven to 350 degrees. Beat the butter and sugar together in a mixer. Use speed 2, or medium speed and beat for 5 minutes. This step is super important because this is where you get some of your height. The butter mixture should look white when done. Beat in eggs one at a time.
2. Beat in vanilla and grapefruit zest. Add the baking powder, salt, and 1/2 cup of the flour to the butter mixture. Add 1/4 cup of the milk. Add another 1/2 cup of flour followed by the rest of the milk. Finish with the remaining 1/2 cup flour and mix until just combined. Take care to not over mix this batter as it will result in cupcakes with tunneling, which is an unattractive crumb on the inside.
3. Divide into lined cupcake tins and fill 2/3 of the way full. Mine baked for exactly 17 minutes and were perfectly done without being too golden brown.
Grapefruit Buttercream
Frosts about 12 cupcakes
1 stick unsalted butter, softened
3 cups powdered sugar
2 drops red food coloring, water-based
1 tablespoon grafruit zest
2 tablespoons milk
Process
1. Begin by beating the butter until fluffy. If your butter is too melty, it won't fluff as much as you want. Make sure you leave your butter out about 2 hours before, but no longer.
2. Add the rest of the ingredients as well as about a tablespoon of grapefruit juice. Beat well until light and fluffy. Spread on top of cupcakes.
Enjoy!
Monday, April 7, 2014
Rustic Quinoa and Bulgar Salad for World Health Day!
Today is World Health Day! Today we celebrate all the wonderfully yummy and healthy foods found around the globe. Today was established as World Health Day in honor of the founding of the World Health Organization and to recognize all of the wonderful things they do. In recognition of today, I'm posting this delicious recipe for rustic quinoa salad.

I have never actually made quinoa before…. so this was quite the adventure! I think for my first try, I did pretty well, I mean it is edible after all. If you too have never made quinoa, theres plenty of literature out there on the super grain. Just visit Pinterest or search quinoa online. If you have never heard of quinoa, then you must have a terrible headache from living under a rock for the past couple years. I've heard of it but I have very little knowledge about what actually makes quinoa so good for you. Without getting into the specifics, quinoa if chock-full of nutrients! In fact it is so nutrient dense that it is considered a complete protein (yay for vegetarians!). There are so many different ways to utilize quinoa such as cold (like this salad), hot (served like rice or pasta), or even ground into a flour and used in baking.
I call this rustic quinoa because I just took a few things that I had in my kitchen along with some of my favorite things and threw them together. It turned out that it all goes really well together! I picked up a package of bulgar and quinoa mix that I found at Meijer in the health foods section. It's made by Meijer Naturals if your looking for the same thing.

First thing is to prepare the quinoa and bulgar. Begin by measuring 1 cup quinoa/bulgar and 2 cups of water. Lightly salt the water and bring to a boil.

Once it is rapidly boiling, reduce to a simmer a cover, cooking for about 10 minutes. You'll know its done when all of the water has been absorbed.

This salad is good both warm and cold so you can let cool if desired. Toss with spinach, pecan pieces, chopped, fresh basil, dried cranberries, and diced tomatoes. I finished it off with a drizzle of strawberry balsamic vinegar from the wonderful Old World Olive Co located in the Downtown Market on Ionia Street, Grand Rapids. I enjoyed it as a main dish, but it can easily be served as a side dish plated with a nice apple braised pork chop.

I have never actually made quinoa before…. so this was quite the adventure! I think for my first try, I did pretty well, I mean it is edible after all. If you too have never made quinoa, theres plenty of literature out there on the super grain. Just visit Pinterest or search quinoa online. If you have never heard of quinoa, then you must have a terrible headache from living under a rock for the past couple years. I've heard of it but I have very little knowledge about what actually makes quinoa so good for you. Without getting into the specifics, quinoa if chock-full of nutrients! In fact it is so nutrient dense that it is considered a complete protein (yay for vegetarians!). There are so many different ways to utilize quinoa such as cold (like this salad), hot (served like rice or pasta), or even ground into a flour and used in baking.
I call this rustic quinoa because I just took a few things that I had in my kitchen along with some of my favorite things and threw them together. It turned out that it all goes really well together! I picked up a package of bulgar and quinoa mix that I found at Meijer in the health foods section. It's made by Meijer Naturals if your looking for the same thing.
First thing is to prepare the quinoa and bulgar. Begin by measuring 1 cup quinoa/bulgar and 2 cups of water. Lightly salt the water and bring to a boil.
Once it is rapidly boiling, reduce to a simmer a cover, cooking for about 10 minutes. You'll know its done when all of the water has been absorbed.
This salad is good both warm and cold so you can let cool if desired. Toss with spinach, pecan pieces, chopped, fresh basil, dried cranberries, and diced tomatoes. I finished it off with a drizzle of strawberry balsamic vinegar from the wonderful Old World Olive Co located in the Downtown Market on Ionia Street, Grand Rapids. I enjoyed it as a main dish, but it can easily be served as a side dish plated with a nice apple braised pork chop.
Enjoy!!
Thursday, February 20, 2014
Shrimp with Spinach Coucous and Avocado Mango Salsa
Yesterday, the sun was shining so brightly! The air was light and you could almost smell spring trying to arrive. Here in west Michigan, everyone was outside soaking up the sun's rays. I was so inspired by the good turn of weather that I stopped at the store to make a summer-inspired dish.

This light and healthy dish is perfect for dinner, especially if you are suffering by the brutally long winter we've been having. I can imagine that this dish would be even more delicious if it's made on a grill. I'll have to try it again once the weather is nicer.
If you're a little intimidated by cooking, you should definitely give this recipe a try. It's fairly simple and really hard to mess up. The clean up is really easy too! You'll need 2 bowls, some tin foil, and a sheet tray.

I found this recipe on Pinterest where I spend a lot of my free time. I've recently been adding a lot of pins to my Clean Eating board which you should check out!!
Baked Shrimp with Couscous and Avocado/Mango Salsa
Yield: 4 servings
Ingredients
If you're a little intimidated by cooking, you should definitely give this recipe a try. It's fairly simple and really hard to mess up. The clean up is really easy too! You'll need 2 bowls, some tin foil, and a sheet tray.
I found this recipe on Pinterest where I spend a lot of my free time. I've recently been adding a lot of pins to my Clean Eating board which you should check out!!
Baked Shrimp with Couscous and Avocado/Mango Salsa
Yield: 4 servings
Ingredients
Thursday, February 6, 2014
USA-Inspired Cupcake Torches
If you've even turned on your TV during the past the couple weeks, I'm sure you are well aware that the 2014 Winter Olympics in Russia are fast approaching! The opening ceremony is tonight, and it's always quite the production. Let's just keep our fingers crossed that it won't be as disappointing as the Super Bowl was this year.

I don't know about you guys, but I can remember sitting in front of the TV with my head tilted back about 45 degrees, my mouth open, gazing as the incredible athletes showcased their talent. I would be captivated for hours by the ice-skaters especially; their grace, fluidity, and poise stunning me. I love to watch the Olympics and I've created this treat just for the opening ceremony!! Because who doesn't love to eat while watching professional athletes workout?
I came up with this idea when I saw a photo in the last edition of the Food Network Magazine (which I love). I took their idea and added my own little twist on it. And so, I present to you, USA Torch Cupcakes!! In order to achieve the "torch-like" look, I baked cupcakes in ice cream cones. You can find these cones in virtually any grocery store. To represent the great USA, I made strawberry cupcakes and filled them with a blackberry/raspberry jam, and topped them with fresh whipped-cream buttercream to mimic the red, blue, and white colors of our flag.
Begin by preparing the cupcake batter. Set up the cones in a cupcake pan by rolling aluminum foil into circles to stabilize the cones during baking.

Fill the cones to the inner ring of the cone. Tap each cone slightly on the table to settle the batter and refill the cones.
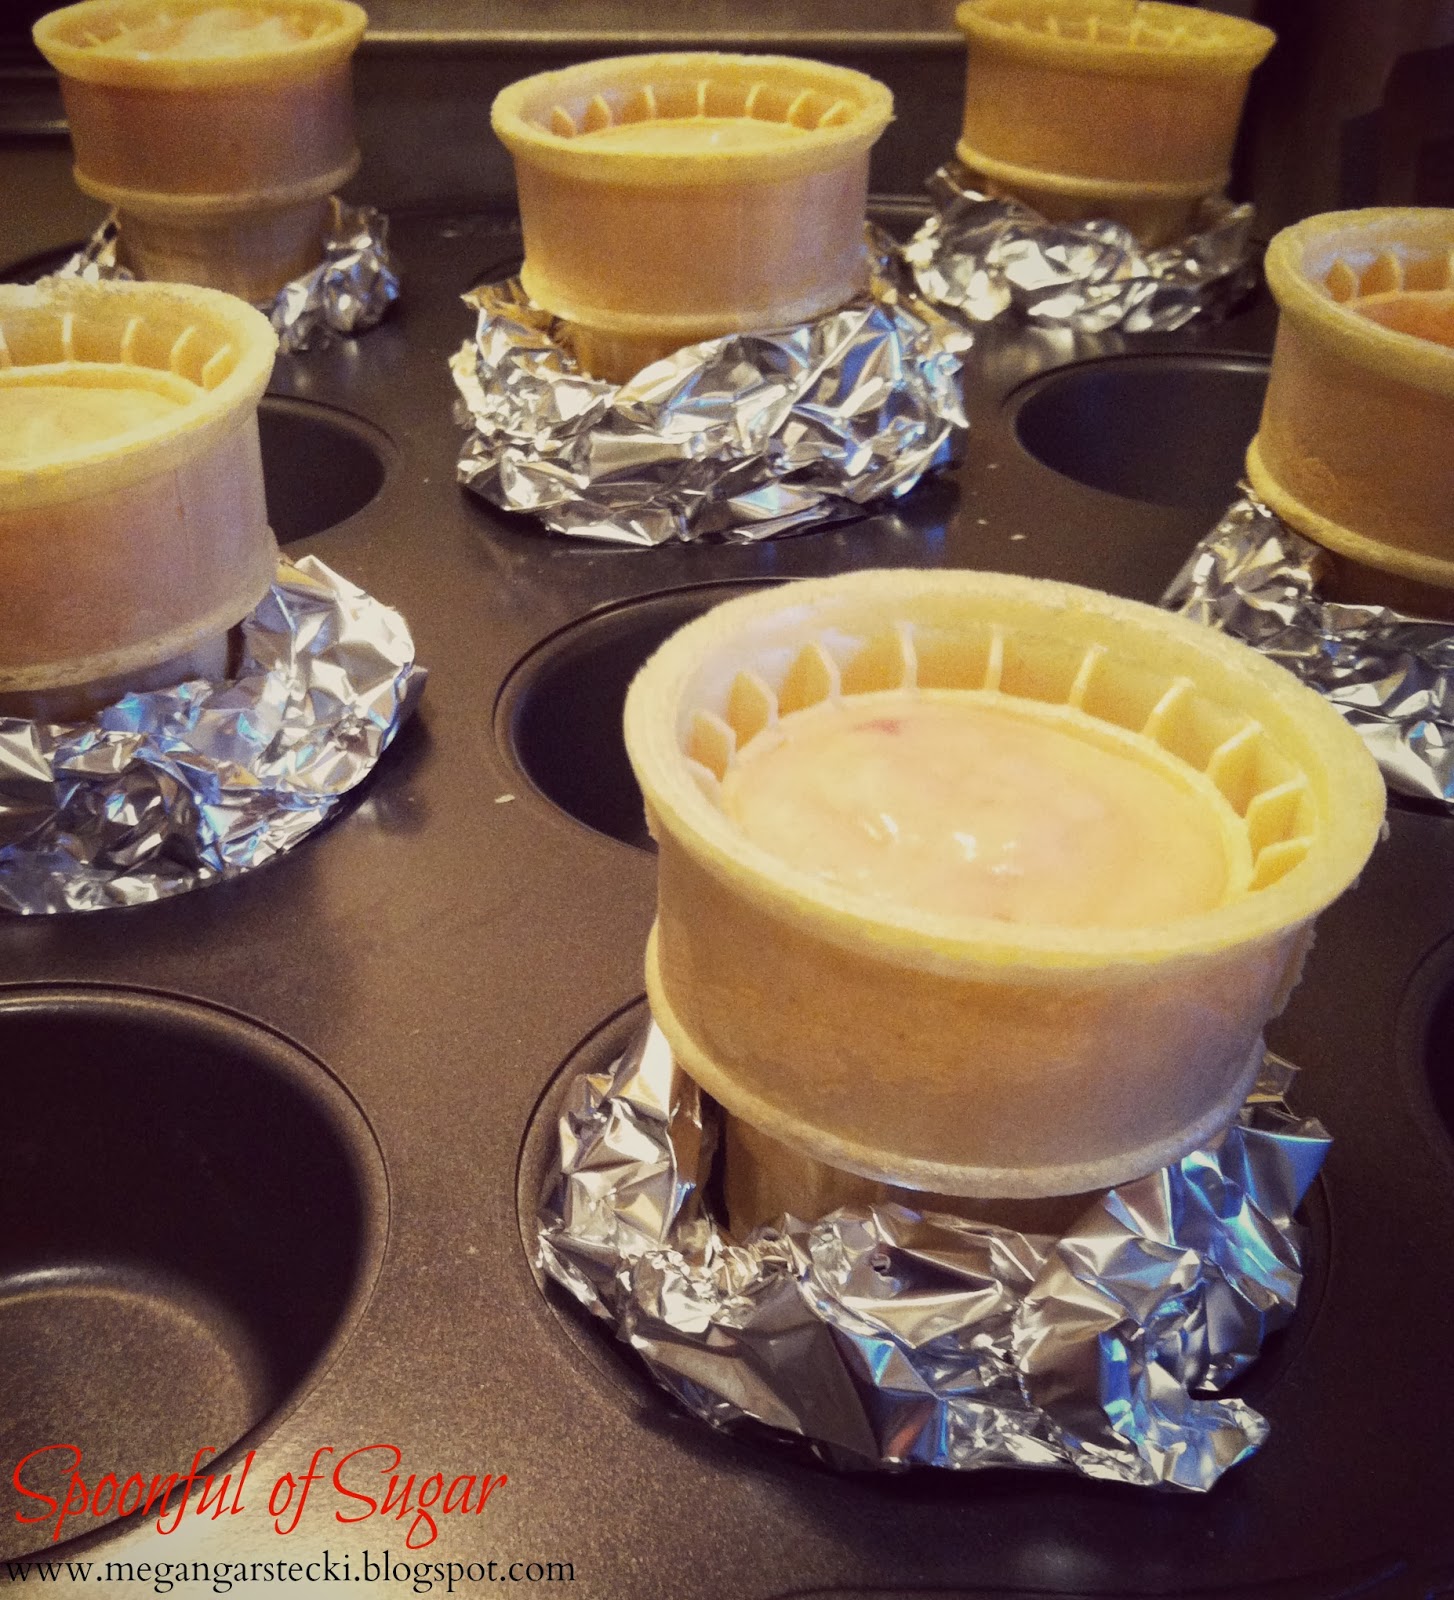
Bake at 350 degrees for about 25 minutes or until the cupcakes spring back when touched. Let cool, fill with jam, and then top with the buttercream. Ta-Da!!
Strawberry Cupcakes (recipe adapted from Sally's Baking Addiction)
Ingredients:
1 2/3 cup all-purpose flour
1/2 teaspoon baking powder
1/4 teaspoon baking soda
1/2 teaspoon salt
1/2 cup unsalted butter, melted
1 cup granulated sugar
1 large egg
1/4 cup yogurt (strawberry yogurt would be ideal but greek yogurt works too)
3/4 cup skim milk
1/2 cup diced strawberries
2 tablespoons strawberry juice (get this by mashing the berries a little bit and then straining them)
Process:
(1) Preheat oven to 350 degrees. Whisk melted butter with sugar until fully incorporated. Add the egg, yogurt, and milk and whisk thoroughly.
(2) Slowly add in flour, baking powder, baking soda, and salt. Mix until combined.
(3) Fold in the strawberries and juice, mixing only until just combined.
(4) Bake for 25 minutes.
(5) Fill a pastry bag with jam. Once the cupcakes are cooled, insert the tip into the cupcake and squeeze slowly while pulling up to fill the cupcake.
Note: These cupcakes will be very moist due to the strawberries.

Whipped-Cream Buttercream
Ingredients:
2 cups softened butter
4 cups powdered sugar
3 tablespoons heavy cream
Process:
(1) In a stand mixer fitted with a whip attachment, whip the butter until it lightens in color, about 2 minutes.
(2) Add in the powdered sugar half a cup at a time, making sure to mix thoroughly.
(3) Add the heavy cream and whip for 2 minutes.


I don't know about you guys, but I can remember sitting in front of the TV with my head tilted back about 45 degrees, my mouth open, gazing as the incredible athletes showcased their talent. I would be captivated for hours by the ice-skaters especially; their grace, fluidity, and poise stunning me. I love to watch the Olympics and I've created this treat just for the opening ceremony!! Because who doesn't love to eat while watching professional athletes workout?
I came up with this idea when I saw a photo in the last edition of the Food Network Magazine (which I love). I took their idea and added my own little twist on it. And so, I present to you, USA Torch Cupcakes!! In order to achieve the "torch-like" look, I baked cupcakes in ice cream cones. You can find these cones in virtually any grocery store. To represent the great USA, I made strawberry cupcakes and filled them with a blackberry/raspberry jam, and topped them with fresh whipped-cream buttercream to mimic the red, blue, and white colors of our flag.
Begin by preparing the cupcake batter. Set up the cones in a cupcake pan by rolling aluminum foil into circles to stabilize the cones during baking.
Fill the cones to the inner ring of the cone. Tap each cone slightly on the table to settle the batter and refill the cones.
Bake at 350 degrees for about 25 minutes or until the cupcakes spring back when touched. Let cool, fill with jam, and then top with the buttercream. Ta-Da!!
Strawberry Cupcakes (recipe adapted from Sally's Baking Addiction)
Ingredients:
1 2/3 cup all-purpose flour
1/2 teaspoon baking powder
1/4 teaspoon baking soda
1/2 teaspoon salt
1/2 cup unsalted butter, melted
1 cup granulated sugar
1 large egg
1/4 cup yogurt (strawberry yogurt would be ideal but greek yogurt works too)
3/4 cup skim milk
1/2 cup diced strawberries
2 tablespoons strawberry juice (get this by mashing the berries a little bit and then straining them)
Process:
(1) Preheat oven to 350 degrees. Whisk melted butter with sugar until fully incorporated. Add the egg, yogurt, and milk and whisk thoroughly.
(2) Slowly add in flour, baking powder, baking soda, and salt. Mix until combined.
(3) Fold in the strawberries and juice, mixing only until just combined.
(4) Bake for 25 minutes.
(5) Fill a pastry bag with jam. Once the cupcakes are cooled, insert the tip into the cupcake and squeeze slowly while pulling up to fill the cupcake.
Note: These cupcakes will be very moist due to the strawberries.
Whipped-Cream Buttercream
Ingredients:
2 cups softened butter
4 cups powdered sugar
3 tablespoons heavy cream
Process:
(1) In a stand mixer fitted with a whip attachment, whip the butter until it lightens in color, about 2 minutes.
(2) Add in the powdered sugar half a cup at a time, making sure to mix thoroughly.
(3) Add the heavy cream and whip for 2 minutes.
Enjoy!
Sunday, February 2, 2014
Super-Light Gameday Favorites
The number one resolution made on January 1, 2014 was to lose weight. Like most of America, I also made the resolution to get fit. But unlike most people, I decided to approach the new year aiming to get healthy instead of just losing weight. Interestingly enough, staying fit and healthy was number 5 on the list of the top ten resolutions (according to the University of Scranton). I kinda caught the nutrition bug when I started taking a nutrition class at Grand Rapids Community College and I love it! Nutrition is a really interesting field to explore. Since I'm in the Secchia Institute program, we are focusing on how we, as chefs, can create meals that are balanced and full of nutritious foods that customers will actually order off of a menu.

Many people only stick to their resolutions during the first couple weeks or so and most people don't even make it through January. I wonder why people give up so easily? Maybe its because of all the fad diets that don't provide you with a balanced diet. If you aren't consuming a diet consisting of protein, fats, and yes carbs, you are bound to begin to feel lethargic. As I was flipping through the January/February 2014 issue of the Food Network Magazine, I came across the In the Know section which contained a very interesting fact. The Food Network did a poll on Facebook and found that chocolate is the number one temptation for people to stop their resolutions. That isn't that hard to believe though, I love chocolate! But as long as we eat it in moderation, or with a balanced diet paired with physical activity its okay!

To help me stay on track, I downloaded this free app, myFitnessPal. They have apps for both Apple and Android phones. The set up is simple, just put in your height and weight and how much you either want to gain or lose (because everyone wants to gain weight). It will then give you a recommended calorie count for each day in order for you to achieve your goal. I simply plug in what I'm eating each day for breakfast, lunch, dinner, and snacks and it calculates how many total calories I've eaten. Also, if I made it to the gym that day, I can easily look up the elliptical exercise on the cardio tab and plug in the number of minutes I did. I really like it because it subtracts the calories you exercised from what you've eaten, allowing you to eat more! Then, at the end of each day, you click the "finish logging for today" button, and it will tell you that if everyday was like today, you would weigh this many pounds in 5 weeks. I've been sticking to this for about 2 weeks and I've already lost 2 pounds!
It's really important to me that I stick to this healthy regime because summer is coming soon and I'm ready for some warmer weather! With the Superbowl being today and all, it can be hard to say no to the hot wings and seven layer taco dips and piled-high nachos. I scoured Pinterest and Google looking for healthier options that I could complete last-minute, since I started looking yesterday. After scrolling for hours, and many debates with my guy about what everyone will actually eat and like, we decided on a taco bar! I don't know why I didn't think of this sooner! It was an especially good idea because Meijer has a lot of specials going on for the Superbowl.

Heres some tips to help you have an awesome taco bar at your party!

-Get lean ground beef, preferably 90-10 ratio. It's an easy way to cut down on calories without sacrificing taste because of the taco seasoning.
-If you're like me (a college student with her very first apartment) you probably don't have all of the necessary individual spices for taco meat just laying around. Thats why I got a taco seasoning package which has just enough for our taco meat today and only cost 54 cents!
-Buy a head of lettuce instead of precut mixes. It doesn't take much lettuce to complete a taco bar and a head of lettuce is usually at least half the price of the mixes.
-We chose the smaller variety of taco shells because they are only 110 calories for 2 shells (and they were on sale!).
-You can do a lot of prep work ahead of time. For example, I diced the tomatoes, minced some onions, shredded some lettuce, and cutting up carrots, celery, and broccoli to add some healthier options instead of chips with our tacos, last night.

In terms of actually setting up the taco bar, there are many different ways to arrange your toppings. I saw a really cute idea on Pinterest! They saved jars from items like pickles and salsa, washed them out, removed the stickers, and put their fresh ingredients, like tomatoes and onions, inside with a spoon. For other ideas for taco bars as well as other themed parties, check out my Party Ideas board or my Game Day board on Pinterest! Above is how our taco bar turned out. I'm sure that if I planned a little more in advance, I could've made it a little prettier but its okay because it tasted great! And most of all, be sure to enjoy the game with those you love.

Photo courtesy of nationalharbor.com
Many people only stick to their resolutions during the first couple weeks or so and most people don't even make it through January. I wonder why people give up so easily? Maybe its because of all the fad diets that don't provide you with a balanced diet. If you aren't consuming a diet consisting of protein, fats, and yes carbs, you are bound to begin to feel lethargic. As I was flipping through the January/February 2014 issue of the Food Network Magazine, I came across the In the Know section which contained a very interesting fact. The Food Network did a poll on Facebook and found that chocolate is the number one temptation for people to stop their resolutions. That isn't that hard to believe though, I love chocolate! But as long as we eat it in moderation, or with a balanced diet paired with physical activity its okay!
Keep checking the blog to see an upcoming post about this crowd pleasing favorite Chocolate Peanut Butter Cake!
To help me stay on track, I downloaded this free app, myFitnessPal. They have apps for both Apple and Android phones. The set up is simple, just put in your height and weight and how much you either want to gain or lose (because everyone wants to gain weight). It will then give you a recommended calorie count for each day in order for you to achieve your goal. I simply plug in what I'm eating each day for breakfast, lunch, dinner, and snacks and it calculates how many total calories I've eaten. Also, if I made it to the gym that day, I can easily look up the elliptical exercise on the cardio tab and plug in the number of minutes I did. I really like it because it subtracts the calories you exercised from what you've eaten, allowing you to eat more! Then, at the end of each day, you click the "finish logging for today" button, and it will tell you that if everyday was like today, you would weigh this many pounds in 5 weeks. I've been sticking to this for about 2 weeks and I've already lost 2 pounds!
It's really important to me that I stick to this healthy regime because summer is coming soon and I'm ready for some warmer weather! With the Superbowl being today and all, it can be hard to say no to the hot wings and seven layer taco dips and piled-high nachos. I scoured Pinterest and Google looking for healthier options that I could complete last-minute, since I started looking yesterday. After scrolling for hours, and many debates with my guy about what everyone will actually eat and like, we decided on a taco bar! I don't know why I didn't think of this sooner! It was an especially good idea because Meijer has a lot of specials going on for the Superbowl.
Photo Courtesy of tireball.com
Heres some tips to help you have an awesome taco bar at your party!
-Get lean ground beef, preferably 90-10 ratio. It's an easy way to cut down on calories without sacrificing taste because of the taco seasoning.
-If you're like me (a college student with her very first apartment) you probably don't have all of the necessary individual spices for taco meat just laying around. Thats why I got a taco seasoning package which has just enough for our taco meat today and only cost 54 cents!
-Buy a head of lettuce instead of precut mixes. It doesn't take much lettuce to complete a taco bar and a head of lettuce is usually at least half the price of the mixes.
-We chose the smaller variety of taco shells because they are only 110 calories for 2 shells (and they were on sale!).
-You can do a lot of prep work ahead of time. For example, I diced the tomatoes, minced some onions, shredded some lettuce, and cutting up carrots, celery, and broccoli to add some healthier options instead of chips with our tacos, last night.
In terms of actually setting up the taco bar, there are many different ways to arrange your toppings. I saw a really cute idea on Pinterest! They saved jars from items like pickles and salsa, washed them out, removed the stickers, and put their fresh ingredients, like tomatoes and onions, inside with a spoon. For other ideas for taco bars as well as other themed parties, check out my Party Ideas board or my Game Day board on Pinterest! Above is how our taco bar turned out. I'm sure that if I planned a little more in advance, I could've made it a little prettier but its okay because it tasted great! And most of all, be sure to enjoy the game with those you love.
Enjoy!
Sunday, September 1, 2013
The Final Countdown
Hello fellow bloggers. I'd like to apologize for my long absence from the blogosphere. Believe it or not I did have a couple posts drafted up but I ran out of time to finish them before they became irrelevant. However, I believe that with each new year, even a new school year, is a chance to start over. So here we go!

This term is especially excitingly nerve-racking for me as my official graduation date is November 23, 2013. That's this year!! In like 3 months! The past year has gone by so fast and I can't believe that I'm about to earn a degree. This wasn't always the plan though. Originally, when I graduated high school in 2012, last year I guess......, I intended on completing the Bachelors program in Baking and Pastry. As I moved rather quickly through the Associates program, which is required before the Bachelors program, I realized that college is very expensive and so is opening a bakery. With that in mind, I started researching other colleges to find a managerial program at a cheaper price. Don't get me wrong, I have loved every second at Johnson and Wales, minus the obvious distance from my loved ones. I have gotten to know one of my best friends and learned valuable skills for the food industry. I hope that my decision to continue my education closer to home will benefit me in the long run.

This term I've had the unique opportunity to become involved in a new cooperative housing option with Johnson and Wales. It's called the Centennial House, which is fitting considering this year JWU is celebrating 100 years and this Fall is the first time the house is open and available to students. I'm really excited to spend a couple months in this house. Also, that means that I get to post more while I'm at school because we have this beautiful kitchen!
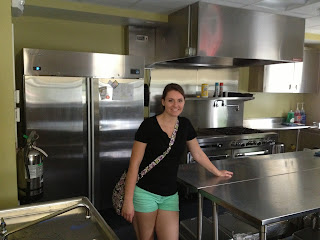
The first recipe I have for this school year is very simple and relatively cheap. You only need three ingredients! It's the perfect late night snack, or post workout meal.
Protein Sandwich
Yield: 1 sandwich

You will need:
2 slices of whole grain bread
Peanut butter
1 banana
Nutella
Directions:
Spread peanut butter on one slice of bread. Slice the banana on top, covering as much as possible. Spread Nutella on the other slice of bread. Squish the two pieces of bread together and enjoy!!

This term is especially excitingly nerve-racking for me as my official graduation date is November 23, 2013. That's this year!! In like 3 months! The past year has gone by so fast and I can't believe that I'm about to earn a degree. This wasn't always the plan though. Originally, when I graduated high school in 2012, last year I guess......, I intended on completing the Bachelors program in Baking and Pastry. As I moved rather quickly through the Associates program, which is required before the Bachelors program, I realized that college is very expensive and so is opening a bakery. With that in mind, I started researching other colleges to find a managerial program at a cheaper price. Don't get me wrong, I have loved every second at Johnson and Wales, minus the obvious distance from my loved ones. I have gotten to know one of my best friends and learned valuable skills for the food industry. I hope that my decision to continue my education closer to home will benefit me in the long run.

This term I've had the unique opportunity to become involved in a new cooperative housing option with Johnson and Wales. It's called the Centennial House, which is fitting considering this year JWU is celebrating 100 years and this Fall is the first time the house is open and available to students. I'm really excited to spend a couple months in this house. Also, that means that I get to post more while I'm at school because we have this beautiful kitchen!

The first recipe I have for this school year is very simple and relatively cheap. You only need three ingredients! It's the perfect late night snack, or post workout meal.
Protein Sandwich
Yield: 1 sandwich

You will need:
2 slices of whole grain bread
Peanut butter
1 banana
Nutella
Directions:
Spread peanut butter on one slice of bread. Slice the banana on top, covering as much as possible. Spread Nutella on the other slice of bread. Squish the two pieces of bread together and enjoy!!
Friday, September 28, 2012
Wrights Dairy Farm

Field trips in high school were always something to look forward too. It meant not having to sit in a desk for 8 hours or turning in homework or even taking a test or quiz. In college, field trips aren't really field trips, except for the fact that they are still exciting!
The Pastry Club here at JWU traveled the 16.2 miles from our Harborside Campus to the Wrights Dairy Farm in Smithfield, Rhode Island. The bus ride was nice, and the whole group was in good spirits, the only damper on the day was that it was raining. Not just like a little drizzle of precipitation, it was a torrential downpour.

Earlier that morning, my roommate Kristina and I were getting ready to head out and meet the group at the bus stop. She was wearing jeans and a nice shirt because I had told her to look cute as I was going to be taking pictures for this post. She hates getting her picture taken by the way. So, when she asked me what shoes she should wear, I was only thinking of her outfit, not of the weather. Plus tennis shoes wouldn't have looked very nice with her peacoat. So I recommended that she wear her black flip flops instead.

As soon as we left the dorm, she shot me a glare. The rain was not to the downpour stage yet, but she still had to step in several unavoidable puddles. Even though her feet were wet, she was not alone. I had been thinking of my outfit as well, so I wore my nice, fairly new Sperrys. My toes were wet almost immediately.
When we arrived, we hurried off the bus and huddled under the overhang on the side of the bakery. The rain had increased in intensity by then. We then met our wonderful tour guide, the daughter of the owner of the Wrights farm. She led us, with our umbrellas in tow, over to the open barn where they keep the dairy cattle. On the way over, we stepped carefully around a suspiciously smelly pile of "mud" and in several puddles. Needless to say, we were kicking ourselves over our poor shoe choice.

Inside the airy barn, cows were everywhere! Imagine that. The rain was coming in through the opening down the middle of the roof, making the center of the ground a muddy mess.

Some of the cows were pretty shy, backing away when we approached with an outstretched hand.

On the contrary, some of the cows were too friendly. I was taking a picture of Kristina, and while she was smiling at me, the cow licked her lapel!

I can tell this cow was very excited to be taking a picture with me, she even turned her head! They were smelly, but it was cool to go see the whole process of how we get our morning milk.

This is where the cows are feed. They feed on hay that the farm produces in the fields behind the barn.

There were so many cows!

This is where they keep the baby cows, the calves if you will. Aren't they cute?? Here, this is a closer look.


Right next to the pods of calves, we traveled into a large building that houses all of the milking equipment.


This is the bottler machine. The bottles go down the ramp and get filled with the milk and then a cap is pressed securely on the top, sealing the bottle.
Next, we traveled into the bakery portion of the farm. It was like we had died and gone to heaven. The smell of fresh whipped dream and warm cookies was intoxicating.

Look at the size of these mixers! I want one so bad. Perhaps someday...


There was everything you could dream of in this tiny kitchen. These raw almond horns looked delish.

And look at the perfect dome on these cupcakes!


These are just a couple pictures of the section of the bakery where they put the finishing touches on the products before they go out to the selling floor.

And this, this is heaven. Or its behind the counter of the store front, but who's asking?


This is the infamous chocolate milk from Wrights. Now normally, I don't really enjoy chocolate milk. It's something about the whole concept of drinking milk with chocolate in it rather than the taste. However, I will admit that this chocolate milk is THE best chocolate milk I have ever had. It was rich but not overbearing, creamy but not thick, a cloud of chocolate in every swig.

And it comes in a half gallon, or this cute personal size.
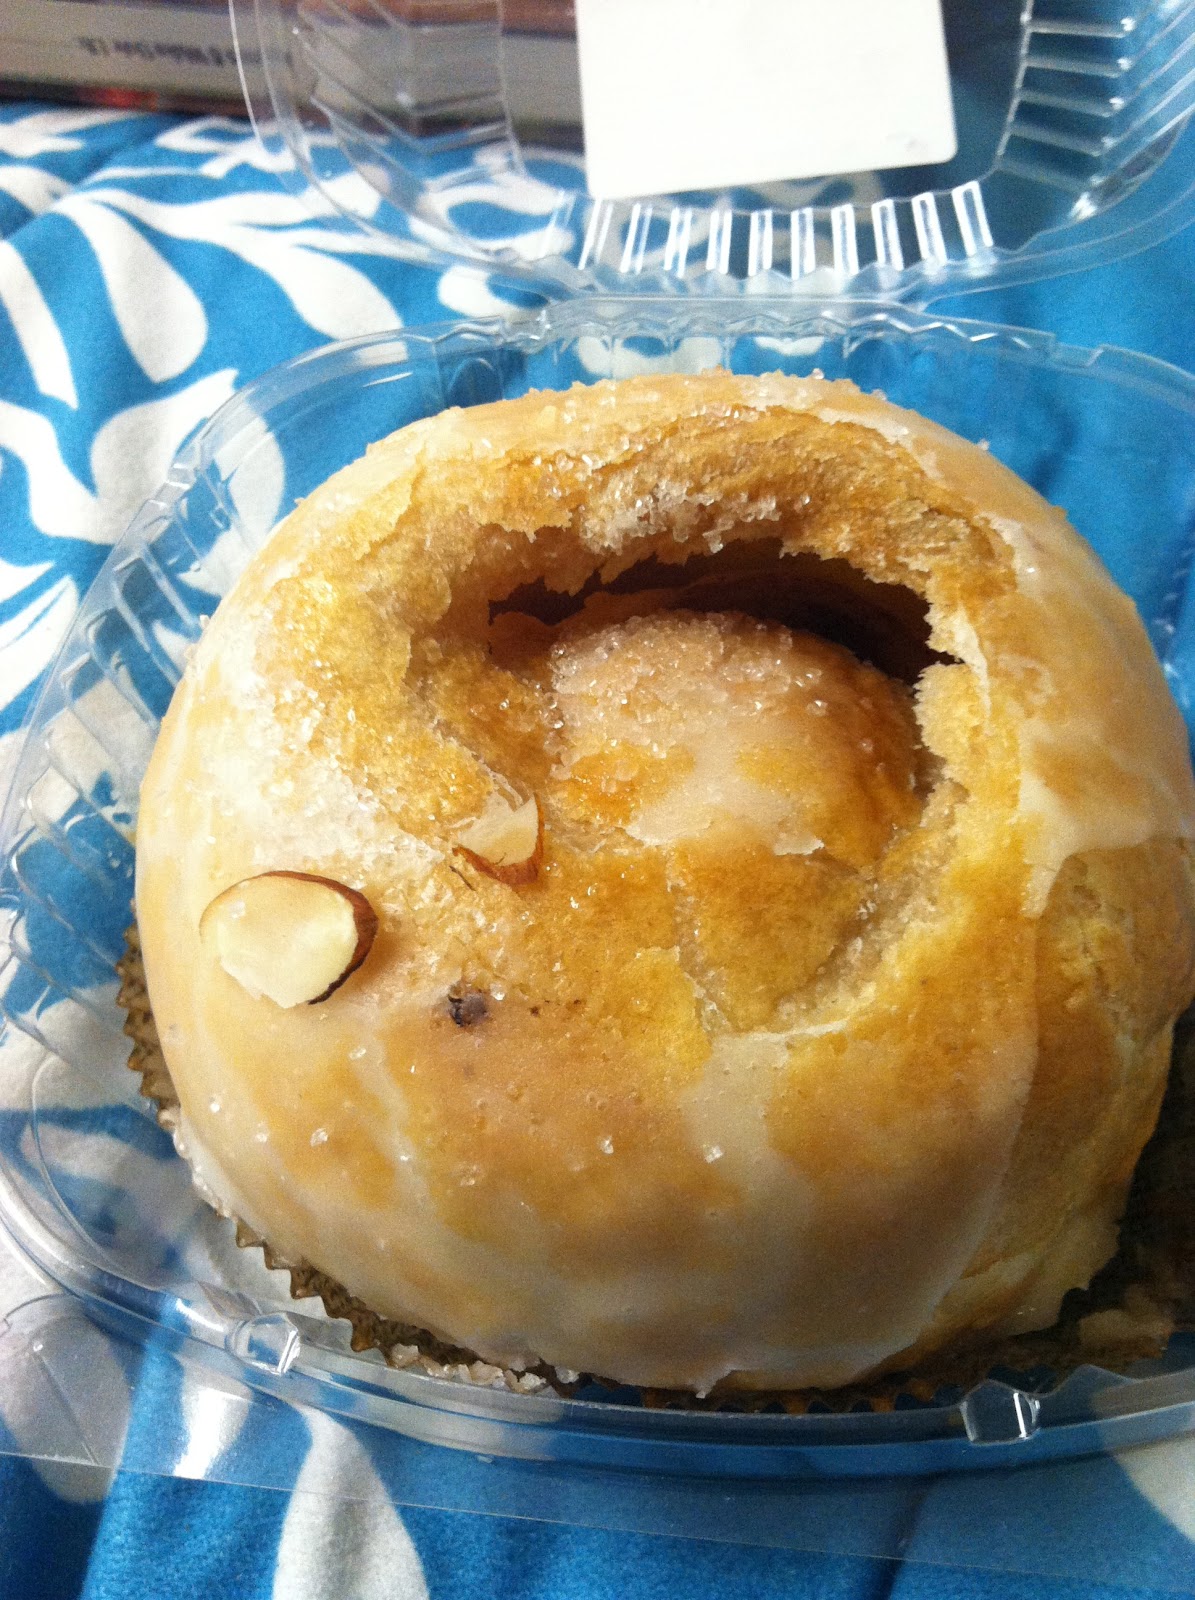
I also grabbed one of their fresh apple dumplings. It was amazing! The crust was flaky yet moist and as soon as you broke the skin, this rich cinnamon apple ooze poured from every hole, soaking the flaky crust in every bite.

The apple itself was tender and moist, housing a sort of cream cheese-almond-cinnamon-sugar filling in its core-less core. I was in love!

It was gone within 3 minutes.
I also purchased a few items to send back home for my guy to enjoy as well as a couple sweet things for myself. We then traveled down the road a ways to the gift shop and resteraunt.

They had Vera Bradley!!! That automatically makes them a really good store.

This is what a typical meal looks like family style.


This is the way an eclair should be filled, to the brim with homemade cream.

I had a wonderful time at Wright's Dairy Farm and I plan on returning very soon!
Subscribe to:
Posts (Atom)